Quest for Coffee (13) | How To Pour Latte Art: My Breakthrough
It’s been a while since I got my hands on the espresso machine and coffee beans. But fear not, my coffee adventure continues no matter how bumpy the road. Pouring latte art has not gotten easier before my hiatus.
But, I might have gotten better somehow. My breakthrough in latte art this week breathes progress in my mastery of latte art.
I know you want to see the picture right now, but it’s always good to have a little patience…most times. Particularly, this time.
Singaporean Cafes Set Misplaced Expectations
You ever catch those “coffee photographers” in the cafe with their IPhones, snapping pictures of their latte which they have bought at least 10 times before? (Admittedly I have taken many such photos, but…with good reason! How else would I set a benchmark for myself?)
Something about that white foamy flower or heart continues to charm the coffee lovers. Or should I say latte art lovers.
If you have visited local cafes before, they do not serve terrible coffee with ugly white patches. Quite the contrary, I have not been served a cup of coffee in a cafe that is not topped off with a delicate heart or flower. It’s practically the norm to have some fancy milk painting on your coffee.
And that’s where the expectations have been set.
We SHOULD see some attractive design on top of our coffee. Latte art SHOULD be a part of the coffee. It’s the “bare minimum” that we SHOULD get a heart. We expect some artistic flair from our baristas. But maybe these cafes have cued our misplaced expectations of coffee.
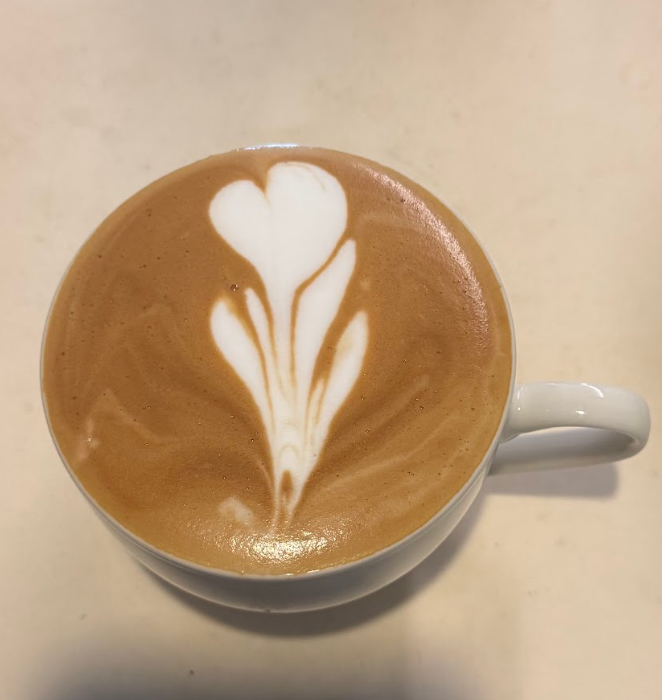
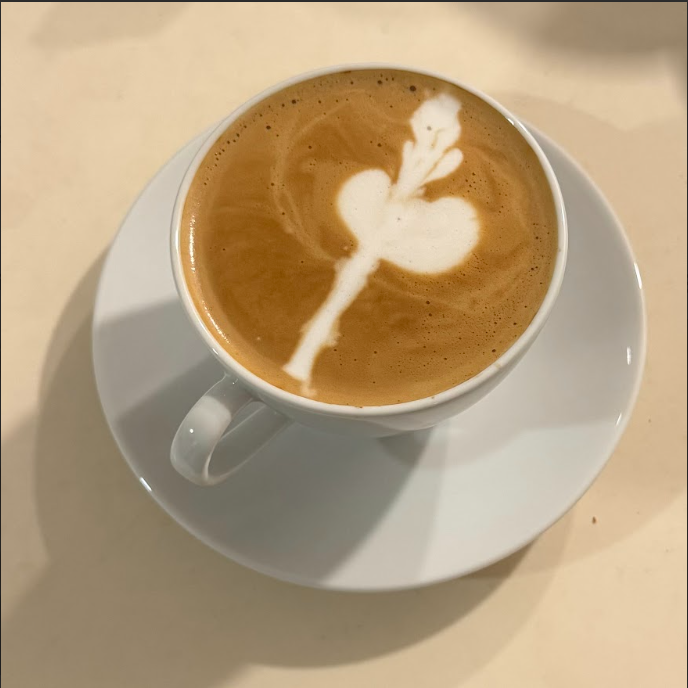
A Latte From A Cafe In Sweden; Fancy. Do you always expect this?
What if there is no latte art? Would this make your coffee that much worse?
Afterall, we are not paying for some milk painting in a tiny cup. We’re getting coffee. And coffee, is exactly what you get.
The Cups of Art-less Coffee
If I asked you right now what fancy latte art means to you, you might say “it looks nice”. More “sophisticated” coffee lovers would say “it adds to the coffee experience”. To be clear, this coffee experience would have nothing to do with taste.
If you drank coffee blindfolded, would you be able to differentiate the one with a design and one without? Surely not. The coffees are the same.
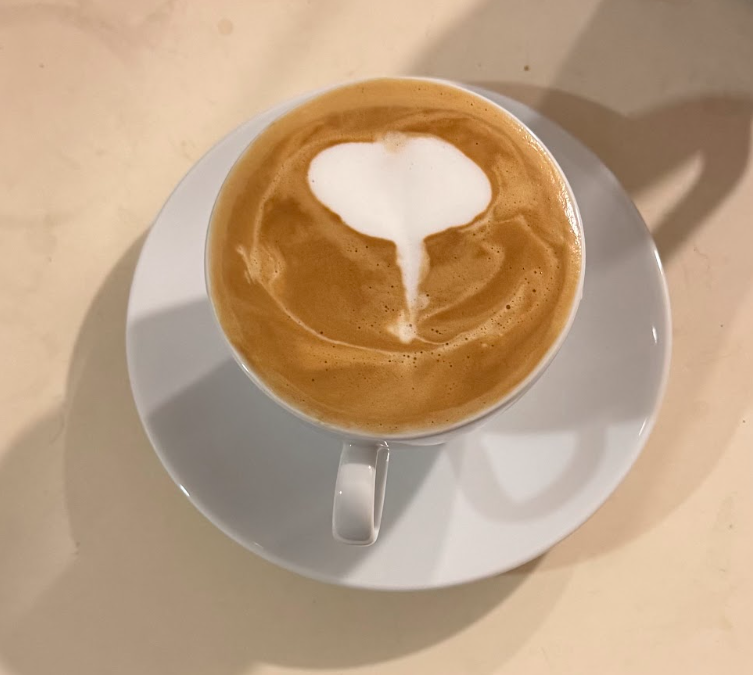
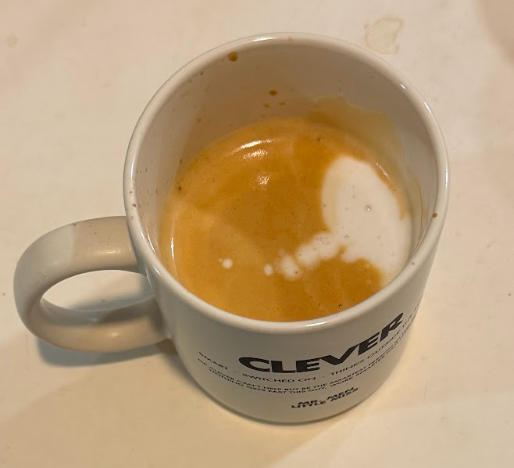
I can proclaim: I have now been served cups of coffee without latte art in cafes.
They do exist. And yes, that was the sound of the expectations being crushed.
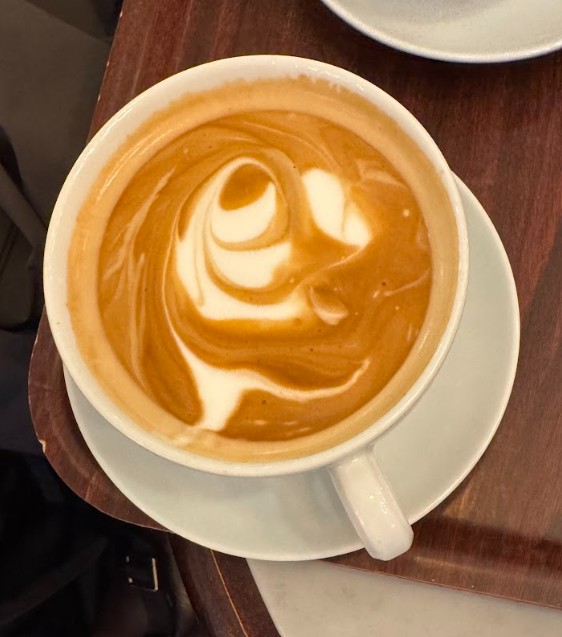
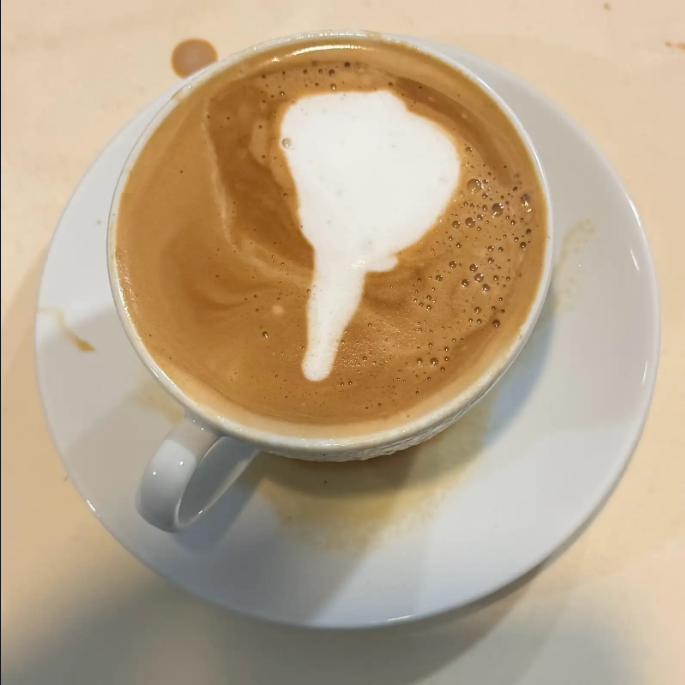
My Latte Served Art-less, In Denmark Artistic ones might say random swirls are just as much art
This was a Norweigian cafe experience. It was surprising and mildly disappointing, as any coffee lover pampered with the latte art expectations would feel. It does feel strange to not see something drawn on the surface, like it’s incomplete in itself as a “mere” cup of coffee. Yet it’s not. It is complete.
The cups of art-less coffees are as much coffees as any other. So that means, latte art is really a “cherry-on-top”. You might not get any design, but you might also get a giant, layered swan or a highly realistic rose. It’s a bonus that became the basic requirement.
Is This Encouragement Or Discouragement For Me?
This is encouragement, without a doubt. It is evidence that a cup of coffee without some milk painting by a talented barista is just as valid a cup of coffee. Coffees can exist without fancy patterns of milk foam!
It also means, I am that much closer to mastering latte art in the “real world”.
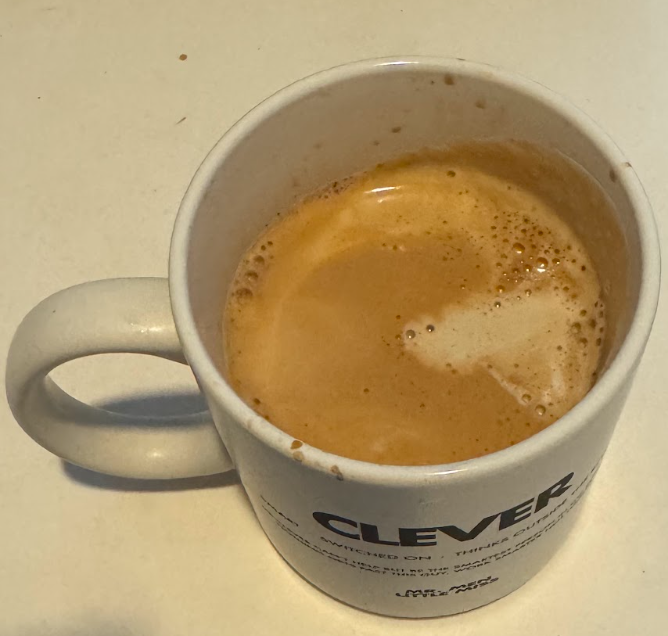
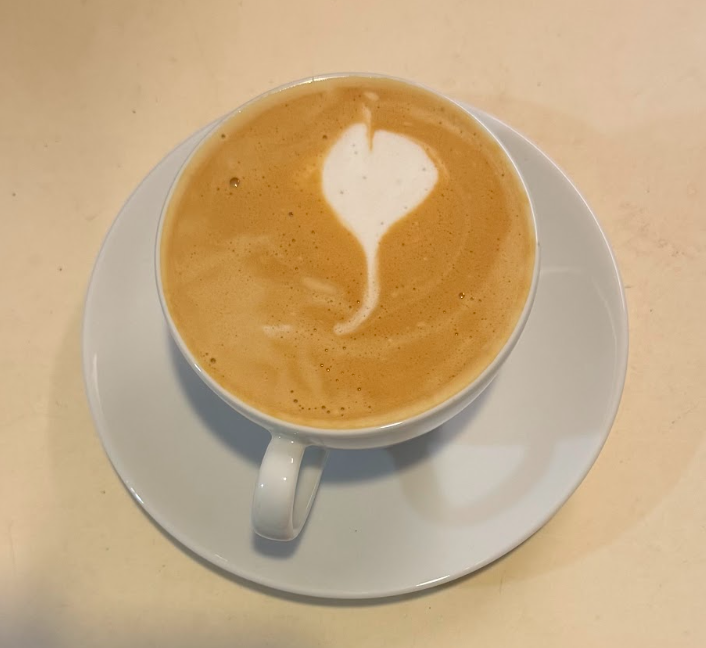
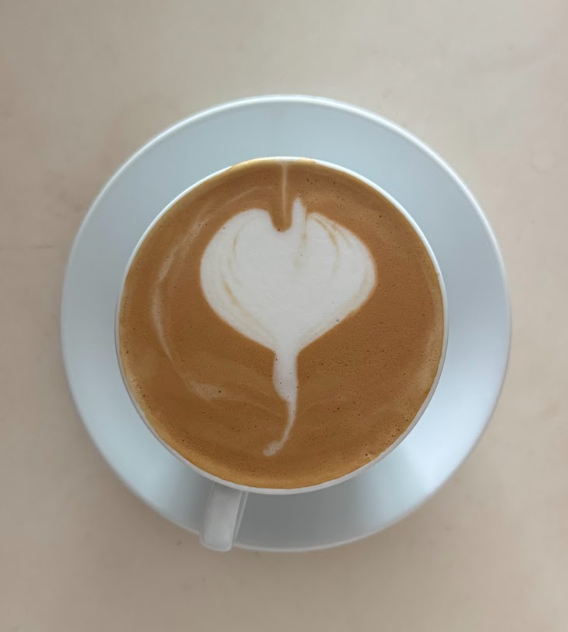
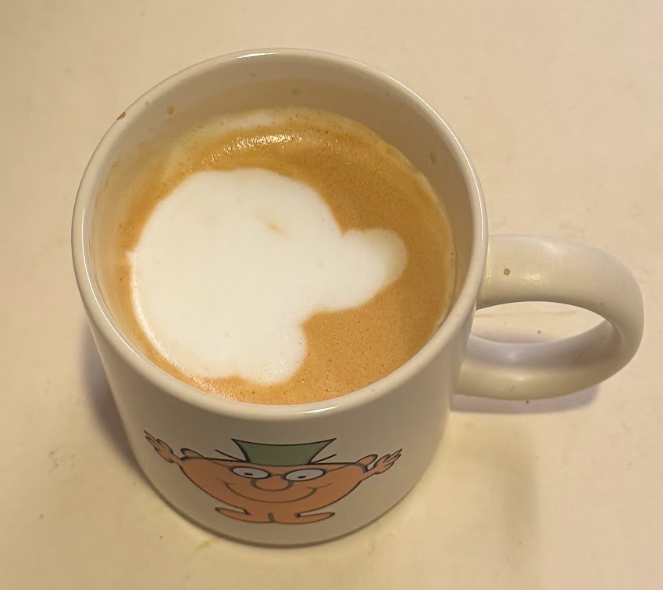
Now, the breakthrough, as promised, is easy on the eyes and proof that even with the hiatus, skills can still be improved by the brain and executed through muscle memory.
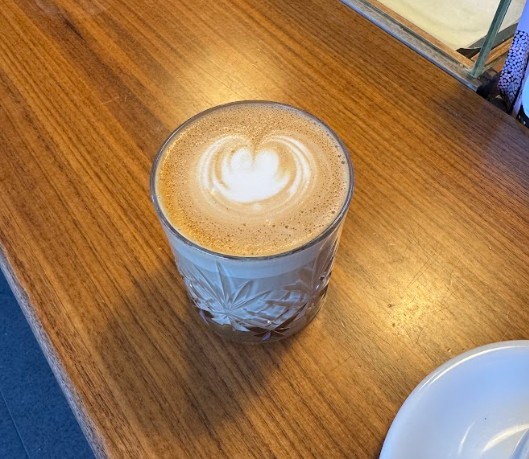
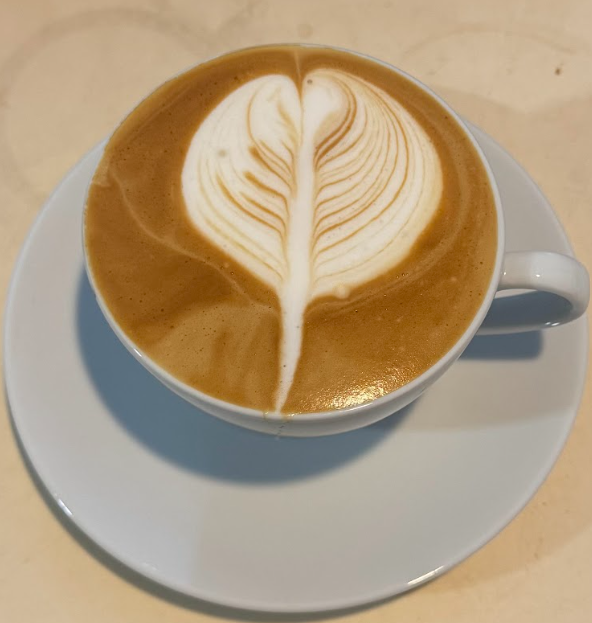
My Own Latte Art Heart, Born 26 Nov 2025 Just look at that “tail”
The “tail” of the heart really amazed me. It has been one of the portions I could not pull off well. This was my first smooth “tail”.
For the past months, I learned by muddling through all my mistakes and trying to replicate whatever made the best milk patterns. It’s practically re-inventing the wheel. The finesse and control needed to form the thin white layers or lines, particularly with the bottom “tail” of any design, can only be learned by my “muddling”. There is simply no shortcut.
But now, knowing you can do it once, with more practice, you can do it again. That’s my hope and motivation, because I know it is very possible.
It CAN be done.
Here are some cool milk paintings (not done by me, yet…), for the eyes:
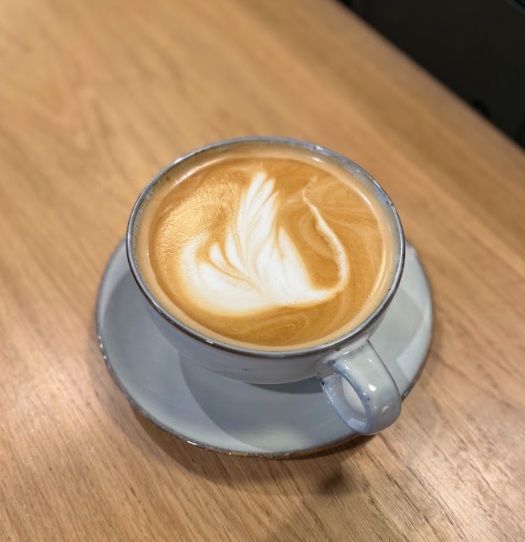
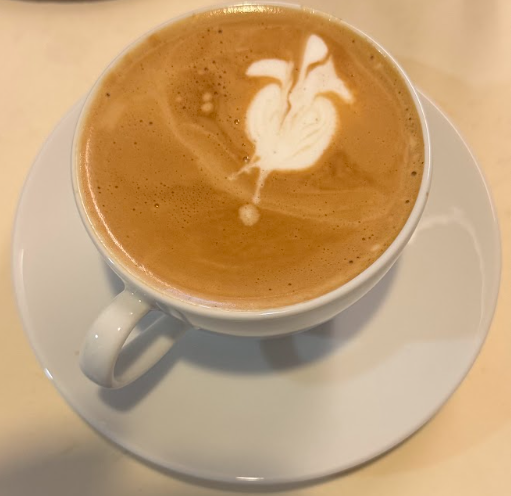
Another Latte Served In Norway This reminds me of magnetic field lines, or an appleRare Swan Sighting In A Restaurant At The Airport
Next time you see a barista pulling off some fancy milk painting, remember not to take it for granted. You didn’t order a Van Gogh-in-milk.
Quest for Coffee (12) | 3 Life Lessons I Learned From Making Coffee
This quirky endeavour of mine to learn to brew coffee and learn latte art has taught me some unexpected lessons and nudged me into having a slightly different perspective on life. Here are 3 life lessons I learned from making coffee, lest we get too lost in life.
1. The Process Is The Destination (Lest We Forget)
Making coffee is a process, one that many treat as a means to an end. The process is an art, a hobby, a morning routine, but also an atelic activity. In my teenage years (not too long ago) when life revolved heavily around school, academics and studying, coffee is a must. And I mean, a must.
But I rarely had time to sit and enjoy the coffee, let alone with a friend. I never “had the time”.
We never do, do we? Until it’s too late.
Grateful For The Coffee (Somewhat)
I drank my coffee but didn’t savour it. I was grateful for the coffee, but not for the chance to enjoy it. And really, what is coffee if not for enjoyment?
The beverage stall in my secondary school canteen used to sell iced coffee (kopi peng) at $1. Yes, those were the days. I distinctly remember being quite the regular customer because I liked it.
But as the months went by and my schedule became busier, it just became coffee which I drank.
It’s so easy to overlook the small but meaningful things we put in our lives, especially when we have “work”. If we drank coffee either way, why not enjoy coffee instead of chugging it like it’s bitter herbal medicine?
My free time spent learning to pull espressos and making coffee showed me that the process itself is worth enjoying as much as the final drink. A hectic student life can easily lead to neglect in the little things and moments, like the simple coffee-making and coffee-drinking joy.
The process is far longer than the outcome. Making the coffee is longer, more tedious and more difficult than drinking it. But it does not make it any less worth doing, at least for those who appreciate coffee. The start and end of our coffee matter far less than the process of making and drinking it. Because the process is where we live.
Enjoy the process. That’s the real gold. The outcome is only a mere moment that reflects the process. Back then, (2 years ago) on my last day of school, I knew I would come to miss the coffee in that canteen. Now, it is wistfully true.
2. Quality Effort is Quality Outcome
When it comes to making coffee, the higher quality beans used would give a corresponding quality of coffee made. But a trashy barista can do a great disservice even to the best coffee beans around. Our world is a fast-paced one, speed is of the essence because everyone has something to do and somewhere to be. Yet, we can barely explain what it is we are doing and how it adds value. This is called “pseudo-productivty”.
This is where a quality barista stands out from the seemingly mundane and homogenous background. The barista, to me, not just brews great coffee but elevates the experience. It is also a corollary tenet of founding Starbucks.
With quality effort behind the scenes, from handling the beans to making the final drink, joy and pleasure in the coffee-making process is passed onto each cup, whether it is for yourself at home or in a cafe.
Quality In, Quality Out.
From carefully weighing the beans to grinding, tamping, then pulling the shot and seeing the honey-like espresso flow smoothly, it is oddly satisfying in each step.
Quality effort in brewing espressos at home becomes an artful form of joy. This is joy derived from being engaged in a meaningful activity. Good coffee is worth all the effort and wait, isn’t it?
A Valiant Attempt At Pulling A Tulip
But I find this principle applies universally to life. In relation to the idea above that “the process is where you live”, an intentional and joyous process seems to inevitably lead to a similar type of outcome. Think of it as “going through the motion” versus “understanding and being present in each motion”.
There’s more than a subtle difference.
In life, this principle applies to the simplest of things, from making coffee to choosing a career. How is the quality of effort behind each action and decision? Just like hastily made coffee for the sake of chugging, rash and low-quality decision-making and actions reflect little to no effort. I shall leave you to imagine what type of outcome this would bring.
Making coffee at home taught me to put great effort into each action. This brings out the joy in the brewing process. More importantly, it shows just how great effort given can yield wonderful outcomes.
3. The World Is Bigger Than I Thought (But No Matter)
There are so many coffee-lovers in this world. There are slightly fewer coffee blogs around. And then, even less coffee content being related to life lessons. The coffee world is bigger than I thought when I had started this journey. From espresso to drip coffee and more, it seems endless.
I started this coffee blog because I wanted to be adventurous and document something new which I am learning. No matter how terribly bad and inexperienced I am. “Difficult” would be putting it mildly if I had to discuss the technical and professional aspects of coffee. But “easy” would be an understatement if I had to relish in a cup of well-brewed coffee.
This blog and knowledge of coffee I have gleaned taught me that the world has much to offer from all those that tried and came before me. Before us.
What About Us In The World?
But even if the world is so big, it doesn’t always mean there isn’t a place for us. For me and you.
In the coffee world, everyone is entitled to the choice of making and enjoying coffee. This is true regardless of whether your neighbour prefers tea over coffee. Joining this coffee world is like seeing a new part of the world, a part that would not have been accessible without first wanting to explore coffee.
Keep chugging coffee for the sake of it and live to never enjoy it. The world is bigger than I thought because it has more knowledge on anything than I had. Embrace it the immensity of it all, or at least try. Because I know I am. Or I’ll live to be overwhelmed by the immensity of the world in everything.
Coffee is a staple of life. A joy, a relief, a habit and many more to so many people. It is also an instrument through which you can perceive life and learn life lessons.
Quest for Coffee (11) | How to Pour Latte Art: Failures
This week’s update is dedicated to my effort that has gone unrecognised in magical designs but nonetheless contributed to my improvement. My journey in learning how to pour latte art has led me along a whole string of failures.
A. Whole. String.
There’s Failures and Failures and Failures
There have been far more failures in this Quest for Coffee than there have been successful latte art magic designs. If you have been following this Quest, you’d know just how tricky this latte art magic can be.
But it made me believe some truths. Truths that I never really thought were real but just things people said:
Success is not linear.
Progress is not linear.
I lived through the failures and the successes. Each latte art design was poured by my own hand and each one was every bit as magical and wild. Many of them were not “latte art magic” and more like a lab experiment gone wrong.
But all of them, failures or not, were great coffees.
Sometimes my hand would deliberately create something halfway wonderful. Other times I get a brainfart and some thick blob-like, magical mess happens. I have realised that it is all part of the process of learning and mastery.
Like I mentioned last time, the whole latte art design is a composite of different pours. The whole design may look like spilled paint, but a small part of it could have been great. Maybe it was the base of the flower, or the fully-filled body of the heart, or that last pour to finish off the bottom tip of the heart.
I write this not just to document my journey in this quirky Quest for Coffee, but also to prove that trying in itself is the only step toward success in any endeavour, magical or not.
There have been many many times when I have been discouraged because of one cup’s ugliness. Sometimes it’s 3 cups in a row. Progress was dismal and slow. I didn’t know if I would ever get anywhere. Ever.
As past me would soon realise, the one cup of failure means nothing. No latte art magic this time, eh, no biggie. I’ll try again tomorrow. And again the next day. And again, and again.
To you, my past self some 4 months ago, using a junky coffee machine that couldn’t steam milk, and to you, my future self who may be learning and struggling in some other Quest, I want to humbly remind you that progress and success comes slow and will never be linear.
So take heart (no pun intended).
You have achieved growth and progress in this journey to create some latte art magic. It’s far from over, but you have proven that you can do it.
And this is proof. At my expense.
Slide
All The Magic Gone Wrong Part 1
None of these cups of coffee was wasted in the practice of latte art magic
Slide
All The Magic Gone Wrong Part 2
None of these cups of coffee was wasted in the practice of latte art magic.
How to Pour Latte Art?
To the many ugly cups of latte art magic gone horribly wrong, I thank you for your teachings.
There will be more failures to come in this Quest for Coffee. Many more cups of failure await. But many other cups with wonderful magical latte art designs await too.
How to pour latte art?
Well… keep pouring your heart and soul into it and never stop.
Quest for Coffee (10) | 5 Ways to Improve Latte Art Magic
Latte art magic is aesthetically potent and incredibly mesmerising, and I most certainly want to improve my latte art magic skills. I thought about how my magic strengthened over the last few months. Here are my 5 recommended ways to improve your latte art magic.
If you are new to my Quest for Coffee, welcome! But where have you been??
I know you probably haven’t tried doing this, but practicing latte art magic is hard. Once you’ve nailed the espresso shot and the milk steaming part, you’re in for the final boss of the game.
It’s the ‘make it or break it’ part – the pouring.
Without silky steamed milk and luxuriously dark espresso shots waiting, there’s little chance of pulling off some crazy latte art magic.
Anyways, if you are ready, here are my 5 best ways to practice latte art magic in my journey so far:
1. Break Latte Art Down
Break down the whole design into various parts. It’s counter-intuitive to break apart the well-crafted and enchanting design, but to learn, you have to see them as individual ‘strokes’ of your ‘paintbrush’.
Confused? Every pour you make is one stroke of a brush. These strokes add up quickly to form your magical design.
For a basic leaf or a flower design (they can be quite misleading sometimes), there are 3 main parts: the ‘base’, the ‘wiggle’ and the final ‘stem’.
The base is your foundation when you create the bottom part of the leaf/flower with solid white milk foam. Your spout of the pitcher must be close to the surface. Pour a controlled volume of milk quickly before then narrowing the flow of milk.
In the second part, the ‘wiggle’, is where the cool brown and white wave-like pattern occurs. Pour a smaller amount of milk than for the ‘base’ while swaying your pitcher from left to right in a stable manner.
I panicked once and my hand shook, which led to uneven patterns on the left and right sides of the design. Uncontrolled magic! This pour should be several seconds long to really drag out the pattern.
Of course, you can choose to pour a fully-filled white heart shape too and skip the swaying.
The ‘stem’ binds the whole lead/flower design together. Pour a narrow but continuous stream of milk from the top of the leaf down the middle and to the edge of the cup. Do not hesitate. I hesitated before and it led to wobbly and curvy stems. Uncontrolled magic again!
As you move from top to bottom of your design, the pitcher should move upwards, with its final position higher above your cup than the position at which it started.
2. Latte Art Needs Restraint
Stay restrained. Work with restraint. Do not give in to the internal pressure to pour quickly like those pro-looking magical baristas.
Speed of pouring comes naturally. My pours in each phase of the design required different strengths and finesse over the pitcher, which you can only learn through experience by feeling and doing.
This takes control, not speed. I had to restrain myself from pouring all my milk quickly to create absolutely nothing.
If you need a pause between the phase of the design, take it.
Usually, I would pour the base first, make sure I got the white base formed first and lift up the pitcher. After that, I would begin the next pour to create the wave-like pattern. I usually remind myself to leave enough room in the cup and enough milk to pour that final thin stream for the “stem”.
3. Intentional Practice
Nothing beats intentional practice.
To try and try again in spite of all the failures to master that one “stroke”, be it the “base”, the “stem” or the “wiggle”.
Sometimes, in each practice cup of coffee, there may be a really solid “base”, or a cool and stable wave-like pattern, or both!
It takes many tries to perfect all 3 “strokes”. My results were and still are lacklustre when it comes to the “stem” (just see below) but there are improvements in the “wiggle” and the “base”.
It may not all come together at once. It has not for me. But that’s normal because every latte art magic design has several parts and “strokes” to it that requires great finesse.
Stay resilient and keep pouring with intention. Keep reminding your mind and hand to act intentionally with each pour and not pour under psychological pressure 🙂
4. Be Messy
You ever see those pro baristas with their magic latte art design while looking cool and calm, with no spills in that nearly-overflowing cup of coffee?
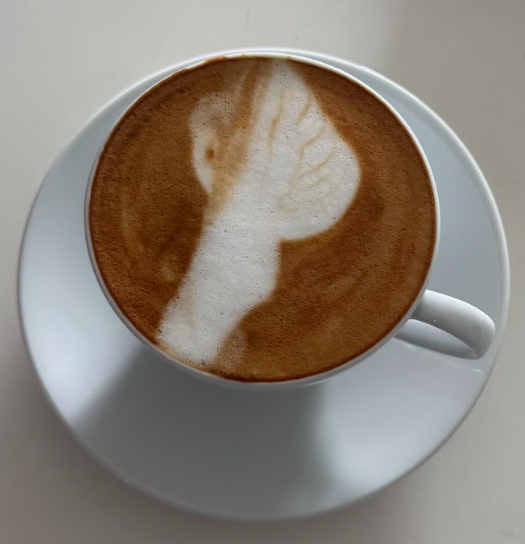
I am the guy with all the spills, errors and shaky hands. I literally dragged the side of my milk pitcher along the surface of my design because the pitcher was that close to it that they were in fact in contact! Just see this wing-shaped distortion of a design:
A wing-shaped latte art design
Suffice to say, that was not very magical.
But it’s ok to be messy and spill some milk and coffee over the counter when pouring and learning. I realised I was not tilting my espresso cup enough as I wanted to avoid spilling.
This meant I had a smaller surface area of coffee to practice my magic, and it made it much harder for the spout of the pitcher to be close to the surface of the coffee.
Just go for the tilt and the pour despite being inexperienced.
Don’t be afraid to drip some milk on the counter when trying that long final pour for the “stem”. It’s fun to just try.
5. Study Your Magic Latte Art Design Closely
How would you know which part of the pouring to work on? With the different “strokes” and breakdown of the whole design, you can start nitpicking and decide which “stroke” or part you want to focus on.
To do so, you have to start examining the weaker spots in your own latte art design.
I started trying to work on the “wiggle” and the “stem” more because I always panic once the cup is near fully filled.
Through taking pictures and intentionally practicing each “stroke” in each cup of coffee made, I saw how my hands shake and how I usually panic toward the end. It is far more important to know what to practice pouring than simply pouring.
Try taking a bunch of photos like me and track your own progress. You might see the improvement trend and you would have documented the whole journey of mastering latte art magic. Wonderful!
Bonus – 6: Read Coffee Blogs like Quest for Coffee
I said there were 5, but here is a bonus way to improve: just read coffee blogs and learn from other people. Sneaky but smart, no?
Now, I have read several coffee articles and many of James Hoffman’s videos. It takes knowledge and practice to attain mastery, especially for something as tricky as latte art magic.
Not only do you need a slow and delicate hand movement to control both the cup and pitcher, it also takes courage and patience to keep trying despite poor results.
Seeing how other people have done it and mimicking their movements to fit my comfort has helped with creating my own style and rhythm of drawing and creating my magical latte art design.
I hope that sharing my progress and providing 5 ways to improve your latte art skills can help you in your mastery. The road ahead in my Quest for Coffee is still long.
But for now, here’s the latest leaf/flower:
The latest latte art magic design – a curved flower
I remember the first time I searched ‘How to Pour Latte Art Flower’ on YouTube. It sure feels like a long time ago, but really it’s only around 3 months ago. Well, I am relieved and excited to say that progress has been made in those 3 months. Oh, the progress and pains.
Getting to Pouring Latte Art
In the last few Quest for Coffee updates, you would have seen my struggles and realised that pouring latte art is a magic easier said than done. If not, check it out here! I promise it’s not a complete gallery of excellent latte flowers and spectacular designs – it’s me stumbling through the failures in pouring magical latte art.
So, I stopped the pattern of watching YouTube videos on pouring latte art. I just slowly found that it’s not all that useful now that I know practice is the key ingredient instead of knowledge.
Practicing and pouring those pitchers of steamed milk have done me more good than seeing the same guy on YouTube pour a magical flower or heart. I want to master the magic of pouring latte art, not watch someone else show off his magical skills.
We’re all fans of consuming edu-tainment (educational entertainment). I know, it’s easy to see those baristas pour mesmerising magical flowers. But it’s not you. It’s not me.
The Progress
Anyways, the bar has been elevated. From a heart-like shape to a leaf-like design, here’s the proverbial bar.
Tulip in the makingI tried a heart-flower hybrid Flower-ish?I tried to make a leaf
The Pains
But now, the pains – the successful pouring of magical latte art designs don’t happen linearly. It isn’t a straight line of progress. (Believe me, it’s a nasty, volatile roller-coaster curve that ideally trends upwards.)
An interesting observation is that a part of the design may have been good even if the whole design was ugly.
The wave-like patterns were obvious in the center picture despite the distorted shape. The contrast and texture of the left image is beautiful despite the lack of detail and poor structure of the heart.
My time spent practicing latte art magic has been rather fruitful, though sometimes frustrating. That said, all things worth trying and failing would always be frustrating at times right?
As a quest-like hobby, it’s been an exciting endeavour to try and create that flower and heart. It’s not for the impatient, this latte art magic, but for those seeking some therapy in creating a delightful and beautiful cup of coffee.
Don’t expect some easy wins.
I can’t imagine how many tries pro baristas have had just to nail one design to the tee. And certainly, they didn’t get there by being addicted to those baristas pouring latte art on YouTube.
What’s the Golden Ratio for Coffee?
Recently, I have also begun weighing my beans! I know, it’s like a ‘pro’ barista or connoisseur thing to do.
But honestly, it’s quite helpful as a measure for beginners to judge whether the input and output ratio for your espresso is right.
The rule of thumb is a 1:2 ratio for coffee beans to liquid espresso. 18g of beans should give 36g of espresso liquid. If your machine doesn’t automatically calibrate to produce this ratio, it’s time to play espresso-engineer.
In very layman steps, take a scale and weigh 18g (for a double shot). Grind it and tamp it in the portafilter. If you need some help with that, check out this quest update from me!
Now, let the machine do the rest and pull the shot. If the grind size (how fine the grounds are) and dosage (the weight/amount of grounds) are well-calculated and paired, the whole shot should be pulled in 25 – 30 seconds.
The Rewarding Result of the Ratio
Just looking at the liquid flow out would give you that internal gut satisfaction which tells you ‘yes it’s correct’. (At least I felt it)
It’s a rewarding result to see happen because you nailed all the steps before the machine did the work and produced the desired output ratio.
Too much liquid – this means insufficient coffee beans (dosage) or too coarse a grind size of beans (grind size). In general, James Hoffman recommends the dosage be altered before the grind size as the latter takes longer to refine and effectively change the outcome.
I have always played around with the dosage when my espresso spurted out without that ‘silky honey-like’ texture. It’s far easier to weigh the beans differently than fix the grinder.
Too little liquid – this means too much coffee grounds (dosage) or too fine a grind size of beans (grind size). Again, let’s play espresso-enginner and alter the dosage before the grind size. I reduced the weight of beans (to 16g/17g) and clocked the shot under 30s. All good!
Practice and Pour Latte Art
Having a great espresso shot waiting for you to practice your magic and pour latte art flowers and hearts over it is half the battle won. Of course, the volume of milk and the ratio to espresso determine your final drink, but it has little bearing over your ability to pour latte art like magic.
You can play with the size of your cup and the milk needed to fill it.
Practice and practice. Pour and pour. Latte art magic doesn’t come instantly or magically, ironically.
‘We are what we repeatedly do. Excellence, then, is not an act, but a habit.’
– Aristotle
I look forward to one day mastering the volume of milk and mastering various magical latte art designs for different drinks. Hopefully, it’ll be a far cry from my novice days of coffee catastrophe.
Ok, so there’s the latest update in my quest. It isn’t rainbows and sunshine. You and I know quite well that the work ahead has been cut out for me. Progress and pains indeed.
Click below for further adventurous updates in my Quest for Coffee
Quest for Coffee (8) | 7 Mistakes Killing Latte Art Magic
In my few months learning to brew the ideal cup of Joe and master the magic of latte art, believe me when I say I’ve made plenty of mistakes. Here are 7 mistakes killing latte art magic, all of which have been made by yours truly. In fact, some of them more than once (oops).
These mistakes are common and practically universal. It’s part of learning, so don’t get flustered just because you see bubbles all over your coffee.
So why can’t you avoid these mistakes? Well there’s knowing the mistake and knowing the technique to prevent it, then there’s actually nailing the execution.
Execution comes with practice: the price of mastery.
So if you’re failing at brewing coffee and wondering what on earth is wrong, let me share some of my failures. Embrace the mistakes; they teach you more than you know.
As the wise green Jedi reminded us:
“The greatest teacher, failure is.”
– Yoda, Star Wars Episode V: The Empire Strikes Back (1980)
Disclaimer: No, you will not become a master after learning from my mistakes. Luke Skywalker did not become a Jedi just because he saw Yoda lift the X-Wing.
He still had to learn, practice and believe.
You must believe you can do it, even if you don’t see any progress. I’ll explain in a while.
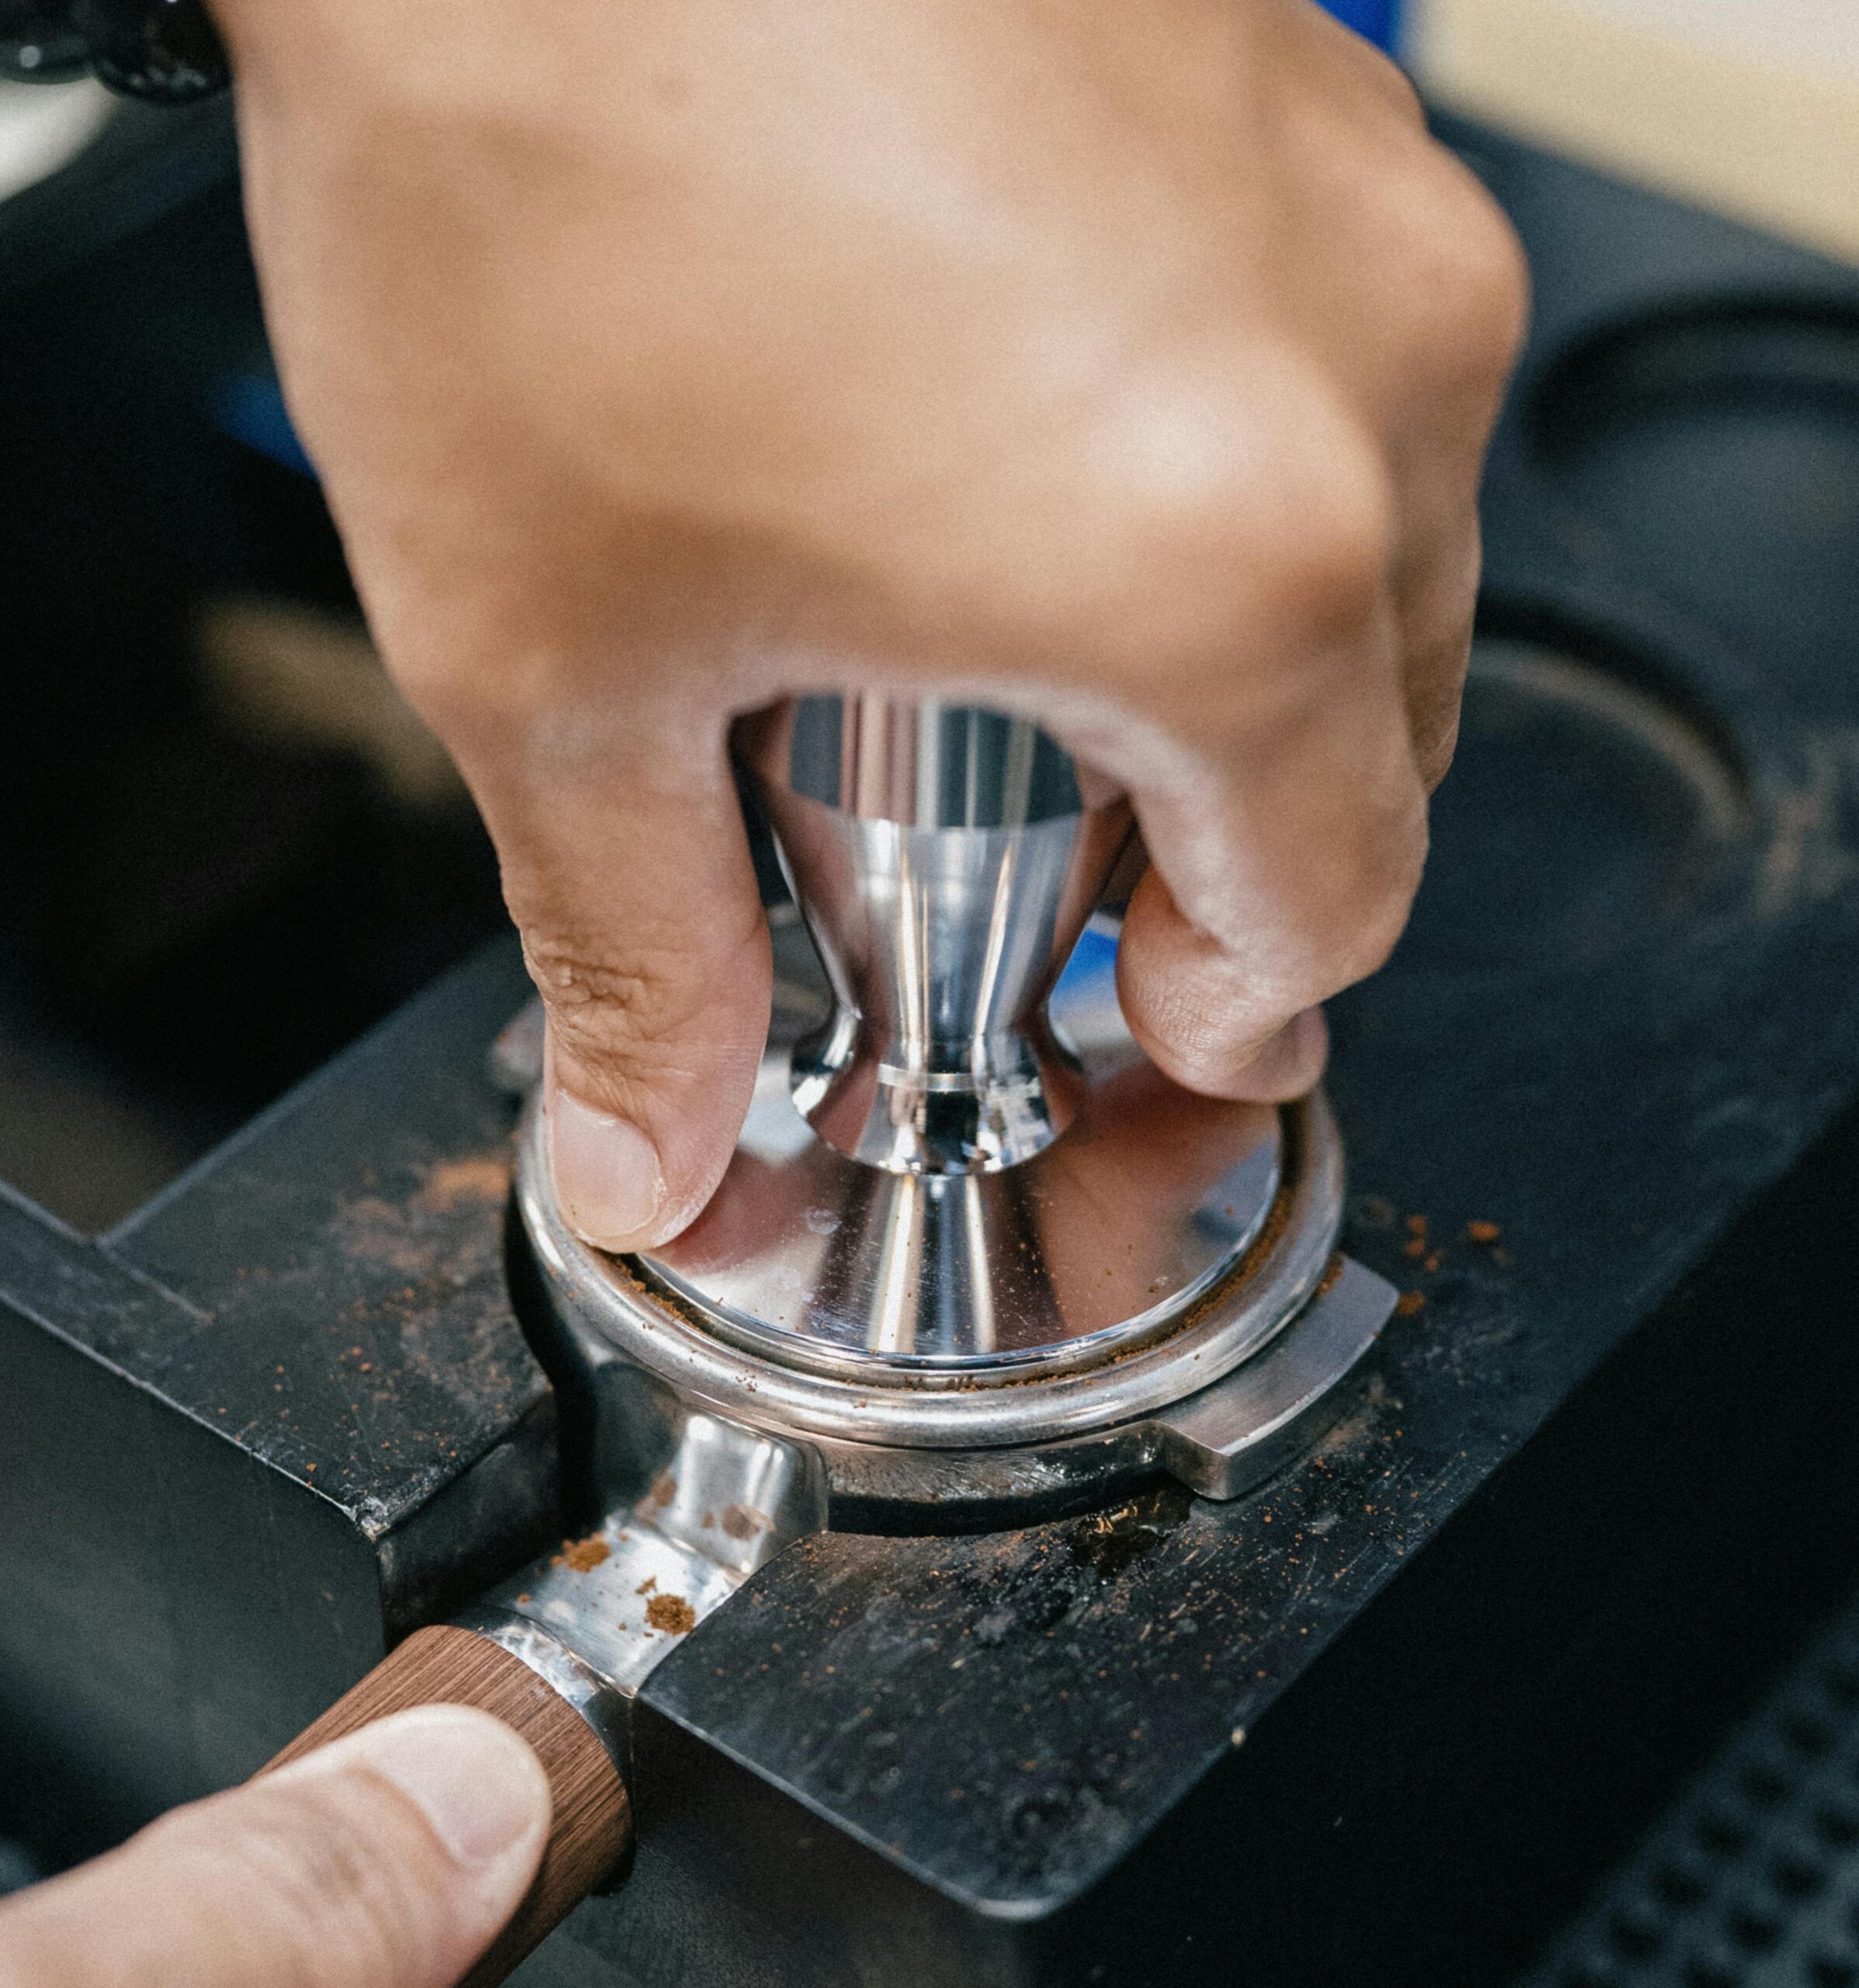
Mistake 1/7: Tamping The Puck Too Hard
The Hulk will not be able to make good coffee.
Tamping ensures that the coffee grounds are packed tightly, neatly and ready for pressurised hot water to flush through.
However, tamping is a delicate step where finesse supersedes strength.
Finesse is key: it can’t be done too lightly, or water simply washes through. It can’t be too hard, or insufficient water gets through. Using too much strength causes the puck to be really tight and gives much greater resistance to the water than is ideal.
There’s just not enough space between coffee grounds for water to seep through.
The outcome is under-extraction – basically ‘wasting’ the essence of coffee.
Your espresso is bland, acidic and incomplete in flavour. Honestly, it’s just a cup of insecurity.
I’ve made this mistake several times because my strength was different each time I tamped. I have since moved to using a machine to tamp, creating equal pressure every tamp.
Mistake 2/7: Steaming Milk With Poor Pressure Control
When I first experimented with steaming milk, I immediately placed cold milk under the tip of the steam wand before turning it on. You get that awkward 10s pause while pressure builds up before some steam gets spat out in bursts.
When you have bursts of air and fluctuating pressure, the milk cannot be steamed consistently.
The more even the pressure that is injected into the milk, the more evenly the milk will incorporate air. This prevents the rising temperature of milk with insufficient air being whipped in.
The trick: let the pressure in the steam wand build up and run for a few seconds before placing the milk under the tip of the wand.
Mistake 3/7: Pouring Milk Too Quickly
Pouring the milk too quickly stems mostly from anxiety or ignorance – both of which are to be expected for beginners.
My many attempts at controlling milk streams mostly ended with strange blotches of white foam on my coffee.
I was anxious that the milk would not flow out fast enough to create the pattern, so I neglected finesse and went for volume.
The thicker the stream of the milk, the more foam stays on the surface. The faster you pour the milk, the faster the foam will spread and the less control you have over it.
I was also ignorant. I never learnt how the thickness of milk streams can affect the design.
After all, whoever told you that pouring slower (and lifting the pitcher higher) can narrow the stream of milk foam on the coffee surface? Well, I just did (you’re welcome).
If you nailed every other step in the journey of mastering latte art magic, controlling your pour and handling the milk with intention would be the toughest.
To truly pull off any magical latte art design, the speed at which milk is poured has to be controlled.
Depending on the size of your pitcher, volume of milk and the size of your cup, the speed and volume of milk used would vary. To err with caution, pour slowly first to test how much finesse you have over the pitcher.
It doesn’t matter if it looks ugly at first. It’s just an experiment.
Eventually, once you are ready to create your design, start with bold, thick streams of milk to form the basic “pool” of white foam before slowly transitioning into a thinner stream.
Mistake 4/7: Watching YouTube Tutorial Repeatedly
Yes, we all do that. We think watching some YouTube video repeatedly is going to change the way we execute the particular action or improve our skill.
Well, I can say with certainty that the only way you pull off that magical heart-shaped latte art is by actually practicing the pouring techniques. This means repeatedly making coffee and failing.
Again, and again, and again.
Watching YouTube videos gave me the knowledge and the ability to course-correct and refine the techniques. But it did not give me the ability.
I watched the same video thrice but to no avail because I had not done the practice. I tried several times since to create some heart-shaped magic on my coffee (it didn’t go so well) but when I rewatched the video again for the fourth time, I saw how my technique could be improved.
Knowledge helps you with correcting the practice, and deliberate, continuous practice awards you the ability to create magic with milk in a cup.
Mistake 5/7: Incorrect Positioning of the Steam Wand
Something a YouTube video can easily help with is showing you exactly where to put the steam wand.
I thought that I could just put it somewhere in the middle and randomly tilt the pitcher.
Again, it didn’t go so well.
It turns out that the positioning of the steam wand varies slightly with the amount of pressure being injected by the machine.
I used to put it in the centre and slide it slightly to the left while tilting the pitcher to the left as well. That gave sub-par results.
I have found that the best position for my machine is to have the steam wand somewhat in the centre, top left quadrant of the pitcher, while I tilt the pitcher slightly to the bottom right.
How do you know the steaming process is well underway?
A tornado with a clear vortex and disappearing bubbles should be seen in the pitcher, all while the temperature gradually rises until it gets too hot to comfortably keep your hand on it.
Mistake 6/7: Tamping Unevenly
If you have read the other chapters in this Quest for Coffee, my journey has taught me that tamping is a step that cannot be rushed.
Patience is the salient ingredient here.
Tamping evenly and delicately gives the right amount of resistance to the water flowing through the coffee puck.
Uneven tamping leads to uneven extraction. Uneven extraction causes blandness, tartness, sharpness and unsatisfactory flavour profiles. I don’t really want that.
It’s like how an even cut of meat will cook evenly in the pan (something I picked up from watching several seasons of Hell’s Kitchen last time).
Similarly with tamping coffee grounds, the “even surface” theory applies.
The best way to achieve an even tamp is to use an even amount of strength to tamp every time. Tamp once and once only.
Mistake 7/7: Wrong Amount of Coffee Beans Used
As I researched how the beans and weight in each puck affected the espresso, I kept seeing the “18g for 36g” and “I stretched a 16g to pull a 36g shot” comments. Basically, wrong amounts of coffee beans can kill the espresso.
Fortunately, unless your ratio of coffee to water is wrong by a ridiculous margin, the difference between 1g or 1ml of water makes a negligible difference.
We are making coffee, not colonising Mars.
If you’re an expert, knock yourself out with the math here.
I did not bother measuring the weight of coffee beans. I placed explicit trust in the machine to grind the right amount of beans. Turns out, you could do with some situational awareness of the machine.
You can choose not to weigh the beans, but you must ensure the beans-to-water ratio is roughly right. To do so without weighing, an estimate can be determined via the portafilter.
The portafilter basket should come with a rough engraving or indication to show what the ideal amount of coffee grounds should be once it has been tamped.
It’s like a ruler but with only one marking.
You can trial and error on the amount of beans you need to get the portafilter packed to the designed volume. Afterwards, the machine does the rest.
Alternatively, you can use time. The back-of-the-envelope guide is for espresso to be brewed in 30s from start to finish. Essentially, vary the amount of coffee beans to hit 30s of brew time.
From there on, you are no longer an amateur and can begin exploring the nitty-gritty details of pulling an espresso shot with weight and grind size etc.
All interesting knowledge, but not for the faint-hearted. To learn what experts know, you must first learn what amateurs know. Practice and then practice again.
Bonus Mistake: I Believed I Was “Special”
I believed I was special; different from others. It’s the same mild hubris everyone has occasionally, for a moment.
To face the truth requires courage to track your progress and judge your work objectively. This means acknowledging that it takes time to learn something new and wild like the magic of latte art.
Something so artistic and refined like latte art magic takes time, patience, practice and discipline. Since the steps and tips mentioned above (and in my other chapters) come as close to the “formula” as anyone else might describe, your practice determines how fast you can pick up the magic ability of latte art.
You have to believe that you can achieve a decent magical outcome in the coffee cup some day.
Even if it takes practice every weekend like myself, or a cup of Joe for practice every morning.
Knowing that you will keep trying and practicing and refining your ability pushes you onward in the field of all the failures, ugly designs, frustrated moments and any other challenges you might.
Remember, I had all these failures at some point and some more than once. It’s just part of learning. Keep on practicing the magic and one day you might just conjure an X-Wing in the cup of coffee.
Hold you back, does fear? Awaits you does my Quest for Coffee.
Courage, you must have. Click below, I’ll see you there.
Learning to create beautiful latte art yourself at home is hard. Even with professional equipment, the mastery of milk is challenging on its own, let alone making magic on the coffee cup.
Knowing the techniques and seeing the experts do it are absolutely not substitutes for your practice – don’t fall into this mental trap as I may have at the beginning. You can’t make magic by watching videos.
Now, after quite a few cups of coffee later, I assure you – practice is practice, and knowledge only corrects the technique to be practiced. Then you practice again.
Mastery of milk may sound basic, and perhaps it is, but it is also a building block of becoming a latte art wizard.
The Key to Mastery Lies in Thee
Apart from sounding fancy, the title is true. The secret to the magic of latte art lies in you and the practice you have.
But, what exactly do you practice?
To truly gain good practice at pouring ‘hearts’ or ‘tulips’ or any other magic milk designs on coffee takes time and deliberate practice. I would even go so far as to guess that the expertise on latte art relies much on muscle memory.
That’s how the magicians in those coffee houses and cafes pull off their magical milk stunts. Practice and experience builds muscle memory to steam milk consistently.
In turn, this builds up the latte art practice and gives them the magical ability to create designs with milk, unlike my attempts at latte art magic, which were more just ‘pouring of milk into coffee’.
Mastery of Milk Makes Magic
It takes well-steamed milk and refined techniques to create proper opportunities for practicing latte art magic.
Mastery of milk, especially steaming it, is no easy task. I sure haven’t had it that way.
I went through a lot at the beginning trying to find out the way to angle the steam wand and the depth at which it should be. Check out my basic tips here.
Despite the practice over the weeks, none of it is close to perfect. It gets frustrating sometimes when I try my best to nail the milk-steaming process, use the techniques I know to be correct, and yet it yields poor results.
The mistakes are all too familiar – watery milk, inconsistent texture, too foamy, poor incorporation of microfoam. You name it.
I still need to touch the pitcher, see the position of the wand, hear the sound of the air and watch the vortex of the milk. Sometimes I need to adjust it to form a powerful vortex. Sometimes the volume of milk is too much or too little for a particular steaming duration. Having a rough guide for temperature makes it easy to time but hard to repeat.
Again, I find more practice required.
Come to think of it, baristas do actually practice all day long at their jobs – every single cup made is practice under their belts. With a long hiatus, their latte art magic skills would become rusty too.
As I describe this journey of steaming milk and making magical latte art, it sure feels harder than I expected.
And it’s almost like a research project now.
I can’t say I have mastered creating the magical ‘heart’ design. The outcomes actually leave much to be desired. But, as I pour and draw and play with the milk, I see improvement in the fundamental technique of creating the shape.
The “Dip and Scoop” Technique
To magically muster a heart in the coffee, one must first channel the milk to form the centre bulk of the shape. Milk should be poured in a manner where a thicker stream enters the cup first.
This technique, as I like to describe as the ‘dip and scoop’, basically performs the function of first pouring the centre of the heart with a thicker pool of foam. After a few seconds, as you slowly push the pitcher forward, you simultaneously scoop the mouth of the pitcher up to narrow the milk stream into the cup, creating the iconic tip at the bottom of the heart.
Of the 4 basic designs, the heart would be easiest to start with for a beginner (like me). I can attest: it doesn’t require experience to first form the basic ‘pool’ of the heart shape.
What does take practice is when you want control of the size of the heart and the shading effects of the heart (layers of light brown inside).
Applying The Technique
In my latte art journey, I am currently trying out the ‘tulip’ design. Similar to the ‘heart’, the “dip and scoop” techniques apply to the ‘tulip’, but with more repetitions.
A ‘tulip’ is almost like 3 or 4 centres of a ‘heart’, each with a smaller size as they move up. With one big long stroke downwards, they are linked together to form the ‘tulip’ design. This stroke helps to shape the design into something like a stem of flowers. Or at least that’s what I understand so far.
Each “dip and scoop” allows the creation of a mini-heart shape on the surface.
‘Tulip’ gave me the chance to keep practicing the new trick of ‘dip and scoop’. Since each part of the ‘tulip’ is different in size, I get to experiment with various speeds of pouring to form the rough shape of the ‘tulip’.
It takes about 3 successful ‘dips and scoops’ to form the body of the ‘tulip’ before the long stroke combines it all.
Why does Mastery of Milk Matter?
My experience with this has been rather…unpredictable.
The milk’s consistency and texture needs to be homogenous. Simply having too thick textures of milk causes the design to be ‘flat’ – it just doesn’t pop.
Yet, having too thin a texture of milk basically doesn’t even allow you to perform any magic latte art. The milk just falls into the coffee and no foam sits above the surface.
Poorly steamed milk ruins your overall latte art performance by reducing your chances of even drawing anything; it also decreases effective practices. That’s just two setbacks we don’t need.
Having well-steamed milk would give the best chance at pouring beautiful latte art and hone those magical powers.
More and more evidently, steaming milk is one level and steaming milk well consistently is another.
I can’t tell you how many times I have steamed milk only to pour latte-nothing.
An example of Latte-nothing
The texture was off. Deep sighs.
Delicious coffee nonetheless.
Don’t Cry Over Spilled Milk
So if anything has been obvious, milk and steaming it are absolutely critical to the strong and enchanting magic of latte art.
Great steamed milk combined with well-trained techniques produces inevitably mesmerising latte art magic!
I really had expected that this endeavour of learning latte art magic would be simpler.
Never had I thought that there would be such fascinating troubles and challenges to create a satisfying end design in the cup. It has been 2 months since I managed to pull out some form of latte art in the cup.
Progress is slow, but present.
The challenges have been tougher than I guessed. And all my mistakes had to be made, they were practically inevitable for any apprentice of latte art magic.
No number of videos and expert demonstrations can replace them.
And knowing they had to be made doesn’t take away the feeling of disappointment. No doubt it is demoralising to see effort but no results, but a quote from Alex Hermozi comes to mind:
You only start from scratch once.
~ Alex Hermozi ~
Every time you try after the first attempt, you start with experience. It may be little and they may seem unimportant, but each new experience takes me closer to mastering latte art magic.
They say that ‘good things are worth waiting for’. I shall keep on keeping on. I expect the journey to go on and for these pages filled in time with my trials and tribulations.
They also say ‘a picture is worth a thousand words’ so here’s my thousand words – several thousand in fact.
A Tulip turned BeanstalkA Fat Tulip with No PetalsTulip In ProgressA Tulip in the Making
Continue on my Quest for Coffee by clicking below. I’ll see you there.
My quest for coffee has taken me on a milky way, since the last time I sent updates from the frontier of my adventure. As I continue my mission to master the magic of latte art, attempts and attempts at putting the art in latte art have been made.
I think of this journey in several parts: learning, practicing, getting good, then staying good. Simply put, I’d say I am between ‘practicing’ and ‘getting good’. It really isn’t as easy to get good at the magic of latte art as I like to say it is. But nothing feels better than seeing your progress right in front of you, held in your own hands.
Watching YouTube videos for inspiration and techniques only got me so far. If you watch the video several times, you might learn a few tricks here and there that help you. But when you watch it repeatedly, I’d say that it gets frustrating when you see experts effortlessly pull off the flattering designs and you can’t. Yours is still a slug.
That’s all too familiar.
A Breakthrough At Last (Of Sorts)
Over the last few weeks, I have transitioned from steaming milk in the pitcher for 2 cups of coffee (4 shots), to trying to ‘break it down’ and steaming milk for 1 cup of coffee per attempt. I got more tries to steam milk, practicing consistency, but also more chances to draw something (or anything that looks like a heart) on the coffee.
With my current steaming method of once per cup, I am delighted to share that I have achieved progress. Faster, in fact. Steaming milk has become relatively easier. No more steaming volcanoes, milk explosions or runny milk and those “magic gone wrong” scenarios. Well…once in a while mistakes still happen (but that’s just human right?)
When steaming the milk, one quick way to identify the maximum amount of milk to use is to fill the pitcher to right below the beginning of the spout’s concave design. Then, look for the vortex as the steam wand hisses away. It doesn’t take long to form when the tip of the wand is just barely beneath the milk. It takes experimenting and many trials and errors to get the hang of it.
Really, it’s like riding a bicycle, except there are no training wheels.
The Good, The Better and The Speech Bubble
Anyways, the progress thus far:
The GoodThe Speech BubbleThe Better
Obviously, I am most heartened by The Better. Pun intended.
The usage of different cups matters. It does…but it does nothing to change your magical prowess. The wand does not define your magic. Your skill and practice do.
A cup that has a small bottom with a hemispherical build would suffice. There isn’t too much to the cup. Cups do little to refine and hone your latte art magic. But, once mastery has been achieved, you are right to believe I will try using various cups for ‘flair’, if not for anything else.
Today is not that day. Today, we are travelling in the milky way.
Right, so I come bearing experience (relative experience) for apprentices of the latte art magic. Here are 3 extra tips on steaming milk and pouring it.
(If you were wondering why there aren’t tips on practicing the latte art magic itself, well, this adventure has not yet reached that frontier. Now, onward through the milky way!)
Tip 1: Air and Milk – Make The Duo Dynamic
The longer the wand tip is held below the milk’s surface, the more foam is created.
If you read the previous update (fix that if you have not here), then you know that when the tip is submerged below the milk surface, a “tch tch tch” sucking-like sound means air is being mixed into the milk. By leaving the tip at that position for longer, more air is mixed with the milk.
Common sense, right?
In the end, it tends to create a thicker layer of foam above which can also leave your milk rather watery because less time was given for the air to fully form the “microfoam” that gives steamed milk that glossy texture.
How much is too much?
But is it “bad” to incorporate too much air?
Well, yes. Think of it this way: the proportion of milk and espresso in a cup determines the type of drink you get.
Similarly, the proportion of air and milk determines how well your steamed milk will turn out. The ratio of air to milk directly affects your final steamed milk and hence the “strength” of your latte art magic.
From experience, the more milk you have, the longer and more air needs to be incorporated. The duration of the air-sucking period is thus longer. It takes time and practice to nail the right amount of air and time to steam the milk.
Given that every machine has a different steam wand pressure, which likely affects the amount of air mixed into the milk, fine-tuning is required with each attempt.
Tip 2: Three-Step Combo Before Pouring Milk
Knock, Swirl, Pour.
Read that again.
After steaming the milk, let it sit in the pitcher for several seconds. Knock the pitcher on the surface of the table to burst any bubbles that had formed on the surface. (Some milk-like volcano is expected, so use a towel to avoid a milky mess.)
Swirl the milk for a few seconds after that. You should see a glossy finish (like wet paint, for lack of a better reference). This mixes the foam at the top with the rest of the milk at the bottom to create a more even texture for practicing your latte art magic.
Once swirled, you are ready for the final step: pouring!
Tip 3: Even The Coffee’s Playing Field
Pour to first ‘even the playing field’. When you first pull your espresso, the first dash of milk gives that “misty” or “foggy” effect. Think of a drop of red dye dropped in a glass of water.
To homogenise the coffee to bring out the familiar, welcoming shade of brown, pour the milk gently from a height (say 5cm above the surface) so that the milk plunges beneath the espresso and mixes well.
Move the pitcher in a circular motion as you pour to stir the coffee until the mixture has roughly homogenised. Be sure not to pour too quickly and fill the cup too much. You gotta leave some for that latte art magic.
I usually do 2 full circles to “even the playing field”. You can do 1 or 3, depending on how much espresso you made and how much milk you pour.
If you have done the milk justice by treating it with patience and finesse, you are all set to practice the fine art of drawing hearts and flowers on your coffees. All that’s left is practice and more patience.
I have had many failures steaming milk and pouring latte art. They are but common occurrences for the apprentice learning latte art magic. Consider them compulsory learning experiences.
Here are some honourable features, at my expense:
A valiant attempt nonethelessA goofy spot of milk left behind by untrained magicThis was a genuine hail mary attempt
Not every try is successful, but every cup is still delicious. This is the process. This is the journey.
The journey through a milky way to mastering latte art magic now awaits you.
Will you take the step forward?
Continue on my Quest for Coffee by clicking below. I’ll see you there.
Frothing milk is as important to a cup of brain-jolting, heart-warming coffee as family is to Dominic Toretto – immensely important, for those unfamiliar with the film reference. Yet, it can quickly become a frothing fiesta at first.
Now, we know you can’t get lattes, cappuccinos or flat whites without frothing milk well.
At this point, I have a confession to make. If you have not guessed it, I have been trying to pour latte art for the last 1 month.
Shocking, I know.
Is that it? Nah, there’s more: I have been trying to master the art of frothing milk for almost 2 months before the last 1 month of learning latte art.
Nothing like Frequent Frothing
It has been quite the experiment as I tried multiple angles, tilting the pitcher left and right, playing around with the milk temperatures and changing the duration of frothing. I was wired trying to achieve that coveted silky milk texture. I still am. I don’t get it every single time…yet.
Until recently, my coffee-making skills were practically pressing the button on my machine and hoping for the best.
Latte art? Frothy milk? I saw them as sorcery reserved for mythical baristas with sleeve tattoos and espresso-stained souls. Something began to change in my milk-frothing journey.
I finally made frothed milk this week thrice in a row with a decent texture and “shone” when placed under lights. So did I pour a dragon or heart?
Nope. Sorry if I got your hopes up.
What did happen was I poured some blob-like design that resembled an attempt at drawing a heart, great emphasis on “resembled”.
The latest shot of the 3 hereOne of the earliest; not sponsored by Harry PotterProbably the second latest one
But hey, there’s progress, and I’m feeling slightly closer to the magic that baristas wield.
Over the last month when the milk began to feel more silky and ideal, I learned several things about frothing milk, brandishing the steam wand (not literally), and some neat tricks for an apprentice of latte art magic.
The Milk Multiverse
Did you think that a latte, cappuccino and flat white were all names of the same drink? I did too. But there’s a surprising amount of difference between them—and no, it’s not just the size of the mug.
Latte: Basically a coffee bath. One shot of espresso and lots of steamed milk, with just a little froth on top. Super smooth and forgiving.
Cappuccino: This one has that thick, pillowy foam cap—like your coffee is wearing a tiny down comforter. Equal parts espresso, milk, and foam.
Flat White: Think of this as a latte’s more intense cousin. Less milk, finer microfoam, more espresso flavor. But, not quite a cappuccino.
To whip these up, it takes some skill at the wizardry of frothing milk and nailing this consistently, unlike my attempts where the milk’s foam resembled sea foam during a storm.
Abracadabra: The Steam Wand
Learning to froth milk was… humbling. Challenging would also be an understatement.
I kept imagining the perfect angle and tilt of the pitcher to get the mesmerising milk ‘tornado” in the pitcher. I had visions of me swirling milk like a pro, creating silky foam like a caffeinated magician. Instead, I scorched milk and somehow made the wand scream like it saw a tornado coming for it.
But as they say, you only fail when you don’t learn.
And I learned:
Cold milk, cold pitcher: Cold milk gives you time to texture it properly. There’s time for the milk to warm up and “embrace” the air whisked in by the wand at the start. It creates “microfoam”. Fancy.
If you’re curious about the science behind frothing milk and the usage of cold milk rather than warm milk, you can indulge in nerdiness here like I did.
Wand placement is key: After many, many cups of coffee and rewatching the same Youtube video on milk frothing multiple times, my tests found a slight tilt of the wrist is sufficient, either to the left or the right. More importantly, place the tip of the wand just under the surface and in the centre of the top left or top right quadrant of the circular mouth of the pitcher. Let it hiss peacefully like a straw sucking a nearly empty cup of iced coffee.
I used to shove the wand into the pitcher with no clue of where it really should be, which just made hot runny milk. No latte art on that one. To get that much-coveted silky texture, you can watch this short video…maybe multiple times like I did.
Stretch, then swirl: Once it hisses, start to listen for that little ‘ch-ch-ch’ sound in the beginning (this is air entering the milk). Count to 5 then sink the wand deeper just until the whole tip of the wand is underneath the milk to create a whirlpool.
That swirling motion smooths the foam, turning it into that beautiful microfoam everyone raves about. Keep it steady, or try to. I tried shifting positions mid-swirling to get the best ‘tornado’ effect which honestly doesn’t make a difference if you nail the position from the start. Fret not if bubbles form at the top of the milk surface! A proper ‘tornado’ of the milk would burst them and leave the milk with a glossy, silky texture when done right.
The heat test: Believe or not, I used a pitcher that measures temperature. But really, all you need to do, as I now do, is just feel the side of the pitcher and stop steaming when it gets hot enough to say “ouch” but not enough to melt skin off.
If you observe those charismatic baristas, there is no thermometer. They use their hands. Getting the right temperature for the milk is an art. It’s magic. Magic cannot be measured, so don’t sweat this. The right temperature creates the environment for the milk to stay in that texture and allows excellent latte art. I learned about temperature and its effects from none other than my go-to connoisseur James Hoffman – check out his video here.
Mythical Art in Progress
Here’s a secret you probably know: watching someone pour a perfect heart into a latte on YouTube is a trap. It looks effortless. It’s magic at its peak.
It makes you “wow” in amazement. Yet, when I tried it, I “wowed” in abhorrence.
Here is a visual laugh-stimulator: my latest creation
An afternoon coffee with a goofy-looking coffee
The quest for coffee continues as I explore and learn to master the magic of latte art. If the images do not self-explain, the journey is just beginning.
Final Thoughts (on Fumbling When) Frothing Milk
Learning to froth milk and make latte art has been weirdly satisfying. It’s equal parts science experiment, therapy session, and morning ritual. Sure, it may not look great now and the magic powers are intermittent at best. But nothing is removed from the excellent taste of the coffee. Now, if you’ll excuse me, I’m off to try making a tulip. Or a slightly abstract flower. Or… okay, probably another blob I picture to be a heart. But it’ll still be delicious.
For more frontiers explored on my Quest for Coffee, click below. I’ll see you there.
It sounds boring. But after making plenty of espresso shots in my Quest for Coffee, I can assuredly say the puck preparation makes the difference. Not a difference…the difference.
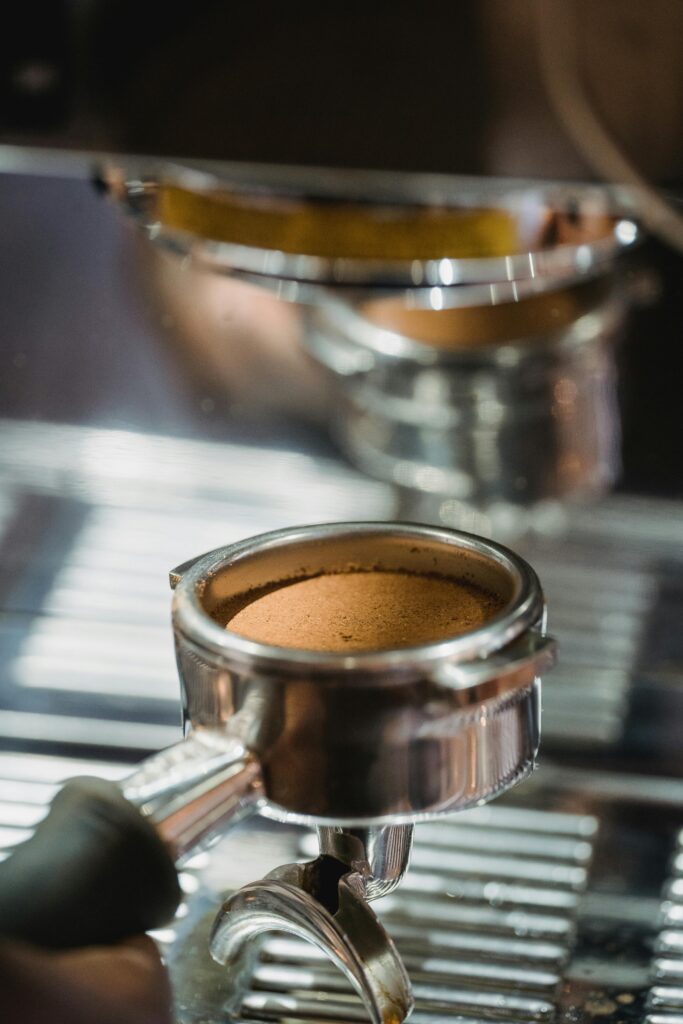
“What is a puck?” you may ask…well, it’s that thing in the picture to the left.
A puck is simply the coffee grounds that have been tamped into the portafilter in a shape resembling that of a hockey puck. You see this shape when you tap the used coffee grounds out of the portafilter after making the espresso.
Puck preparation is key to ensuring even pressure and consistent extraction.
Here are 8 simple and practical tips for making the perfect espresso puck, explained with tips from my experience!
If an amateur like me can do it, you can too. Let’s go!
1. Distribute Grounds Evenly
Benefits:
Uneven coffee distribution leads to weak spots where water can channel. As we explored earlier, uneven distribution causes your coffee puck to be tamped unevenly.
When using a coffee machine that allows auto-tamping (if you own a fancy $$$ machine, that is), always ensure that the puck is flat and smooth on the surface before loading it up for brewing.
How:
After dosing (a fancy term for allowing coffee grounds to fall into the portafilter), gently shake or tap the portafilter to level the grounds before tamping.
This may require additional support from tools such as a portafilter attachment that allow the coffee grounds to fall into the portafilter first without using the machine to tamp. Most machines without auto-tamp functions built in facilitate this.
2. Use a WDT Tool (Weiss Distribution Technique)
Benefits:
Breaks up clumps and redistributes grounds for uniform density across the entire surface of the portafilter.
How
Stir the grounds in the basket with a fine needle or specialized tool before tamping. This is like a “comb” for coffee grounds. Once the coffee grounds are sufficiently distributed, you are ready to tamp.
Experience Tip:
If a WDT is beyond your reach, gently using a small fork with thin tines to stir the grounds should do the trick.
If the puck is tamped using a machine, consider having a manual tamp at hand to even out the surface if the machine does a lacklustre job.
Sounds mad that the machine designed to tamp can’t get it right but as far as bizarre goes, some machines just don’t perform as desired.
3. Grind Consistently Fine (Espresso Grind)
Benefits:
Consistent grind size means a consistent level of extraction throughout the final puck. This gives a smooth, even extraction process, creating a beautiful shot of espresso. Conversely, inconsistent grind size causes uneven extraction—the fine grind clogs, the coarse one under-extracts. It messes up the harmonious blend of flavour, aroma and colour.
How
Use a burr grinder, not a blade grinder.
Coffee machines that have built-in grinders meant for brewing espressos usually already come with burr grinders.
Burr grinders crush the beans evenly based on the setting of grind size. Adjust the grind size of the grinder until the flow time during the brew is ~25–30 sec for a 1:2 ratio shot.
If your brew time is more than 30s, you need to “unclog” the puck slightly, so reduce the grind size for finer coffee grounds for water to flow through faster.
If your brew time is less than 25s, the water is simply “flushed” out between the coffee grounds; increase the grind size so the coffee grounds are finer and water meets greater resistance during brewing.
Experience Tip:
To control the ideal 25-30s window, there are 2 main factors: dosage and grind size.
Dosage refers to the volume of coffee grounds within the puck, while grind size refers to how big each grain of coffee ground is. A higher dosage means a higher amount of coffee grounds within the puck. This increases resistance for the water, and increases the time taken for water to pass through.
The same effect is achieved by keeping the dosage constant and reducing the grind size. A smaller grind size gives finer coffee grounds, More resistance is met by the water, causing longer brew time.
Do you know which is a better factor to control? I’ll let you “brew” over this question…
4. Use the Right Dose
Benefits:
Dosage, as we understood earlier as volume or amount of coffee beans, affects the overall time taken for the brew.
Good dosage controls the volume of coffee grounds in contact with the water for maximum flavour and aroma. Under-dosing leaves too much space (and leads to channeling as the water can easily “escape” through the puck at higher pressures) while over-dosing prevents full water contact because water may not fully extract all the goodness from all the coffee grounds.
How:
Follow your machine’s recommendation (e.g., 18g for a double shot) and weigh your dose. Weighing your dose ensures that the exact amount of beans is ground and used, consistently making the ‘dosage’ factor a constant.
Experience Tip:
Play around with the settings for dosage while keeping the grind size the same (say size 2) and see how much coffee grounds you need for a 25-30s brew time.
If you find too much coffee grounds is used per espresso shot, reduce the grind size with a desired smaller dosage.
Similar to distribution, even and firm tamping builds up the “compactness” of the puck to withstand the pressure of the water. Water has a difficult time trying to escape the puck and this avoids “channeling”.
Uneven tamping tilts the puck, causing water to flow more through one side and…you guessed it…under-extraction and over-extraction occurs.
How:
Place the portafilter on a flat surface with the brim parallel to the surface. Hold the tamper level and apply consistent pressure. Press down directly with a delicate but firm motion (about 30 lbs is enough). Tamp once and once only.
6. Keep the Portafilter Dry
Benefits:
A dry portafilter ensures that the coffe grounds are dry so that there is no chance of coffee grounds in some areas being more “compact” than others.
This then allows for even extraction and even flow of water. A wet basket/portafilter causes uneven puck integrity and channeling…that’s a no-go.
How:
Wipe it dry before dosing the coffee…it is that simple.
7. Handle with Care
Benefits:
Handle with care once all the effort and delicate techniques have been applied so that all that work can translate into a great espresso shot.
The compact puck stays exactly the same, ready for brewing if no blunt force is applied to “break” that puck.
Any bumping or knocking can crack or unlevel the puck, opening paths for channeling and making the espresso a disaster in the brewing.
How:
Tamp once and insert it straight into the machine without rough handling, wait out and fret not, tamp and brew, touch and go.
8. Use a Bottomless Portafilter
Benefits:
It shows you real-time flow, perfect for spotting channeling. Not only do you get to enjoy a beautiful and satisfying flow of coffee, but you also enjoy the fruits of your labour preparing the puck.
A golden brown, silky smooth espresso shot should be flowing from the bottom into the cup
How:
If the espresso sprays or flows unevenly, adjust your prep technique accordingly. It likely occurred due to poor tamping, uneven distribution or rough handling. You know your process best!
This is the “data analysis” part of the process where you can fine-tune the techniques.
Don’t be afraid to experiment. If something amazing occurs here, all you need to do is rinse and repeat your process.
Now all you have to do is sit back and relax with a wonderful cup of Joe.
Puck preparation for espresso may feel labourious and boring, but as I have learnt, coffee making is done best when done with care and patience. It takes more than good coffee beans to make good coffee.
With these 8 tips, you can now be prepared to brew an amazing cup of Joe. Or two. And then some…
Once you have made your coffee, the Quest for Coffee continues.
Take your next step in the Quest for Coffee by clicking below.