Tag: steaming milk

  • Quest for Coffee (7) | Mastery of Milk

    Quest for Coffee (7) | Mastery of Milk

    Learning to create beautiful latte art yourself at home is hard. Even with professional equipment, the mastery of milk is challenging on its own, let alone making magic on the coffee cup.  

    Knowing the techniques and seeing the experts do it are absolutely not substitutes for your practice – don’t fall into this mental trap as I may have at the beginning. You can’t make magic by watching videos.

    Now, after quite a few cups of coffee later, I assure you – practice is practice, and knowledge only corrects the technique to be practiced. Then you practice again. 

    Mastery of milk may sound basic, and perhaps it is, but it is also a building block of becoming a latte art wizard.

    Apart from sounding fancy, the title is true. The secret to the magic of latte art lies in you and the practice you have.

    But, what exactly do you practice? 

    To truly gain good practice at pouring ‘hearts’ or ‘tulips’ or any other magic milk designs on coffee takes time and deliberate practice. I would even go so far as to guess that the expertise on latte art relies much on muscle memory.

    That’s how the magicians in those coffee houses and cafes pull off their magical milk stunts. Practice and experience builds muscle memory to steam milk consistently.

    In turn, this builds up the latte art practice and gives them the magical ability to create designs with milk, unlike my attempts at latte art magic, which were more just ‘pouring of milk into coffee’. 

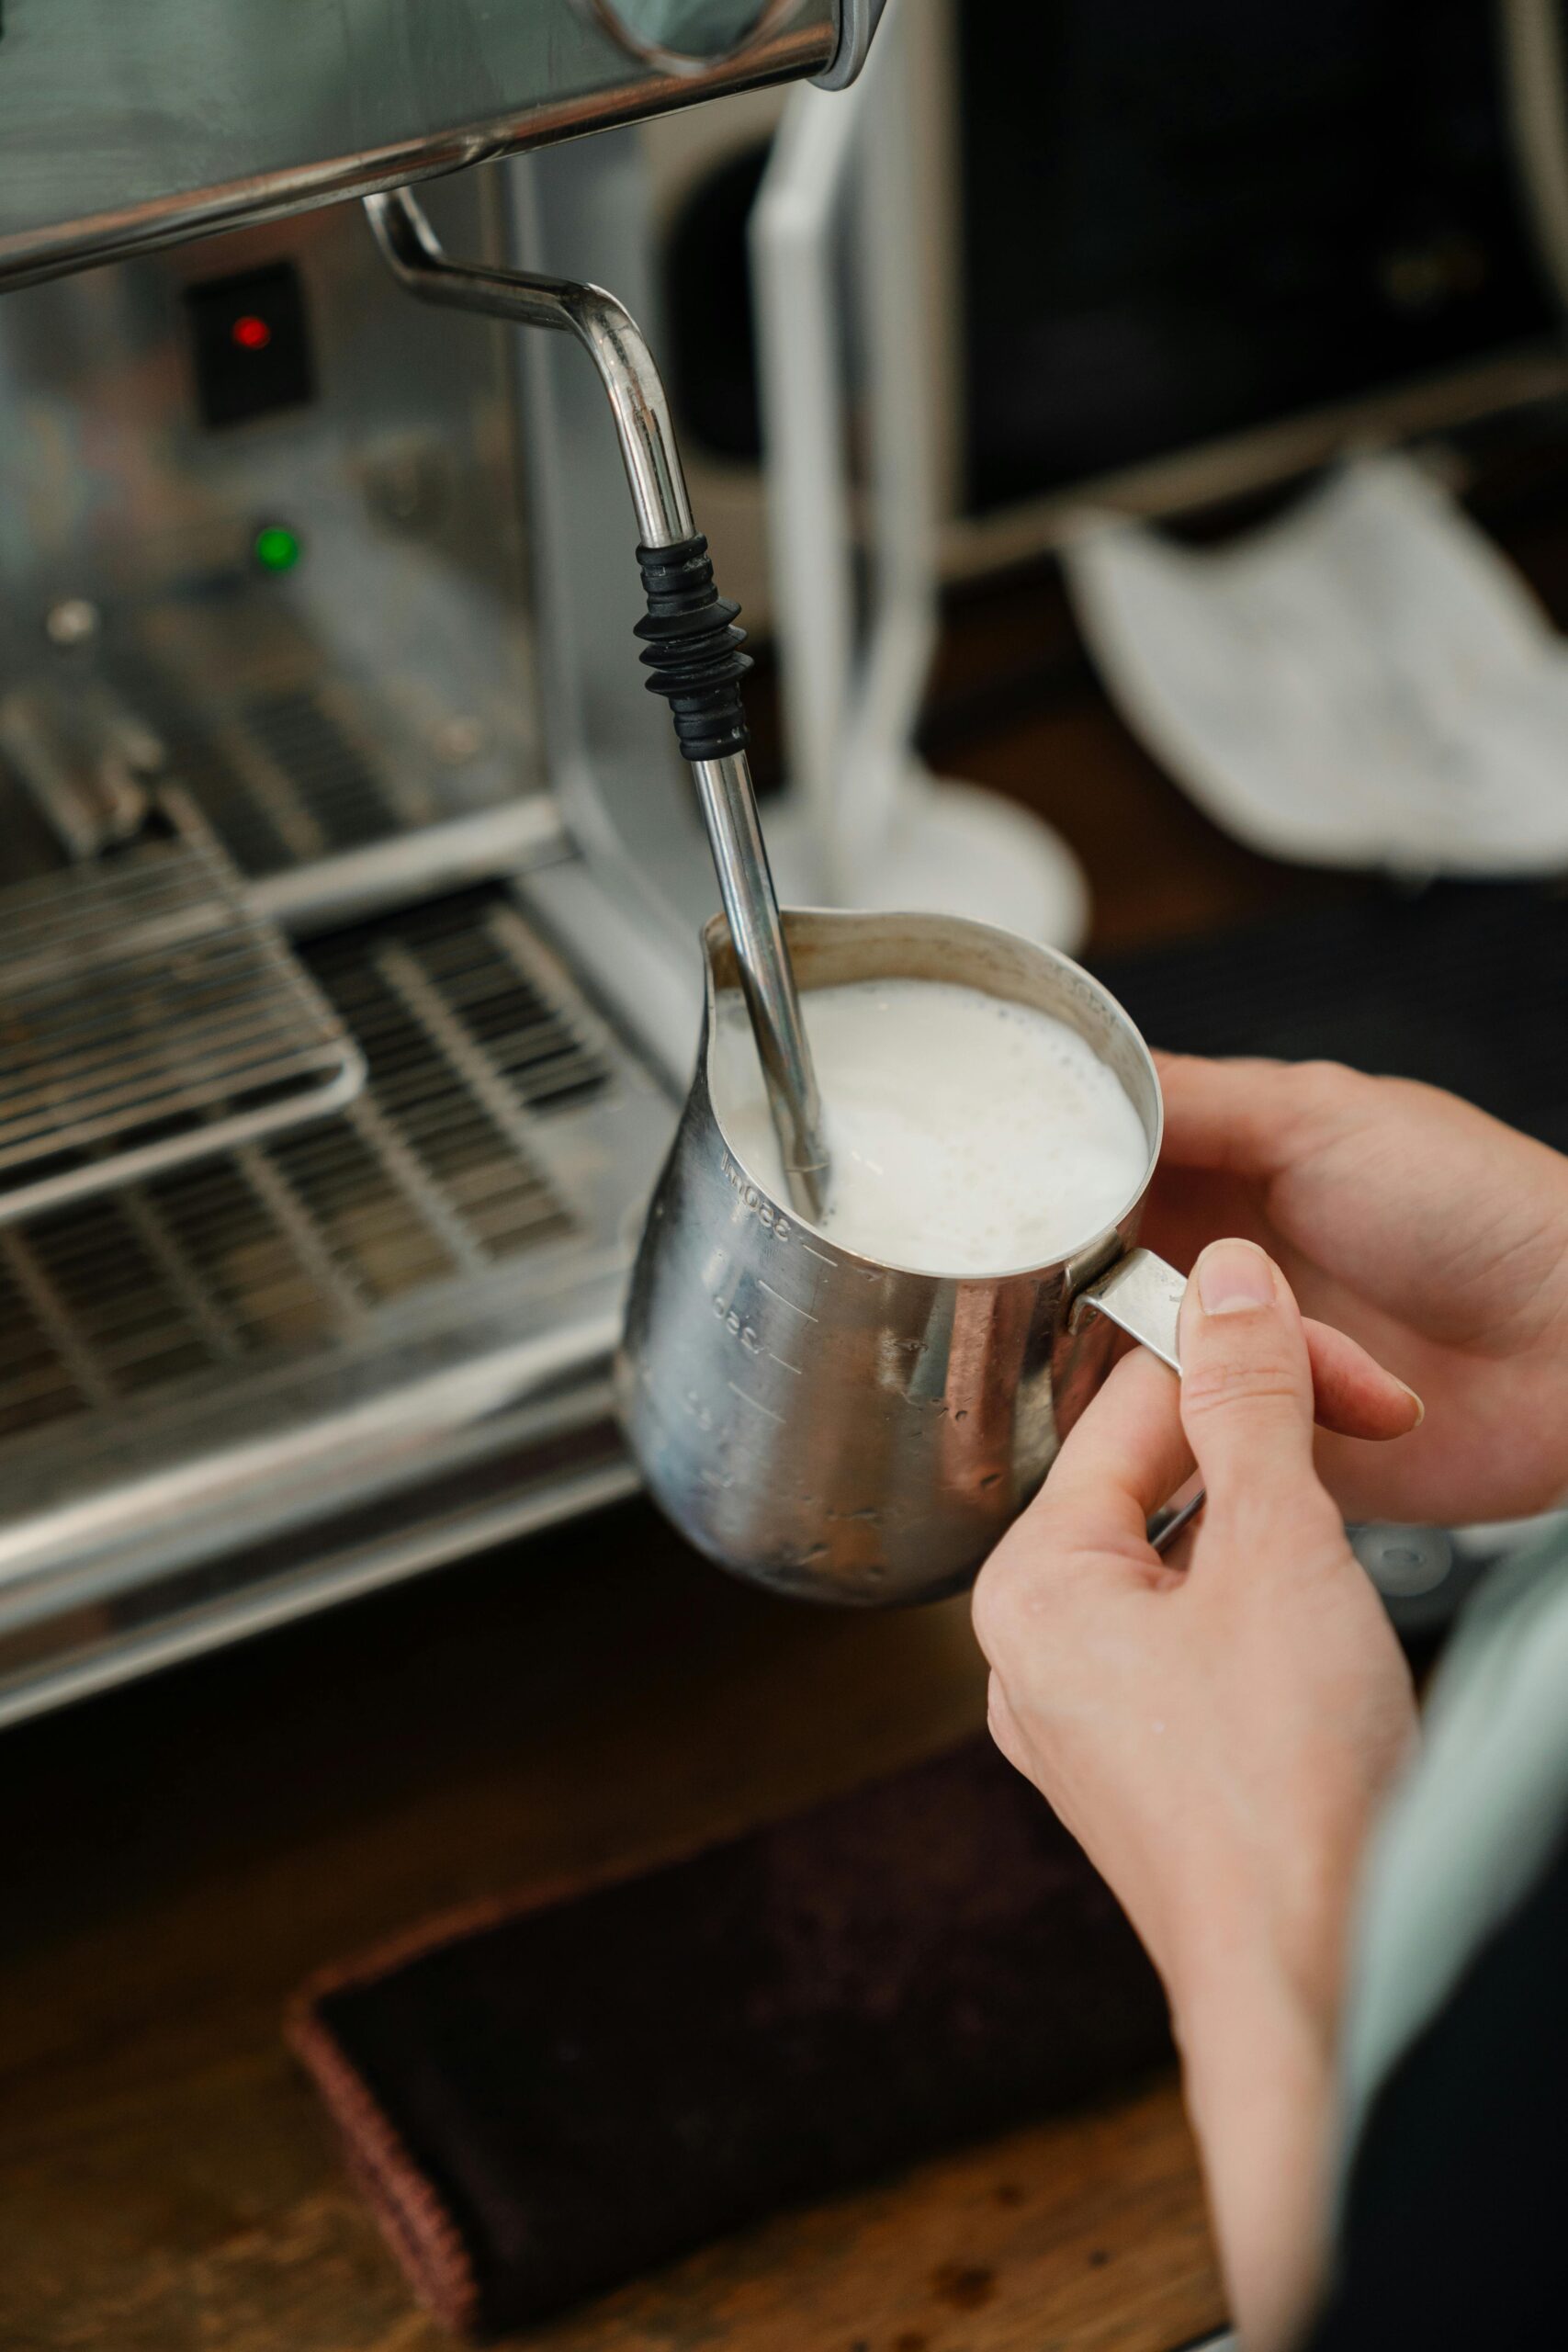
    It takes well-steamed milk and refined techniques to create proper opportunities for practicing latte art magic. 

    Mastery of milk, especially steaming it, is no easy task. I sure haven’t had it that way.

    I went through a lot at the beginning trying to find out the way to angle the steam wand and the depth at which it should be. Check out my basic tips here.

    Despite the practice over the weeks, none of it is close to perfect. It gets frustrating sometimes when I try my best to nail the milk-steaming process, use the techniques I know to be correct, and yet it yields poor results.

    The mistakes are all too familiar – watery milk, inconsistent texture, too foamy, poor incorporation of microfoam. You name it. 

    I still need to touch the pitcher, see the position of the wand, hear the sound of the air and watch the vortex of the milk. Sometimes I need to adjust it to form a powerful vortex. Sometimes the volume of milk is too much or too little for a particular steaming duration. Having a rough guide for temperature makes it easy to time but hard to repeat. 

    Again, I find more practice required. 

    Come to think of it, baristas do actually practice all day long at their jobs – every single cup made is practice under their belts. With a long hiatus, their latte art magic skills would become rusty too.

    As I describe this journey of steaming milk and making magical latte art, it sure feels harder than I expected.

    And it’s almost like a research project now. 

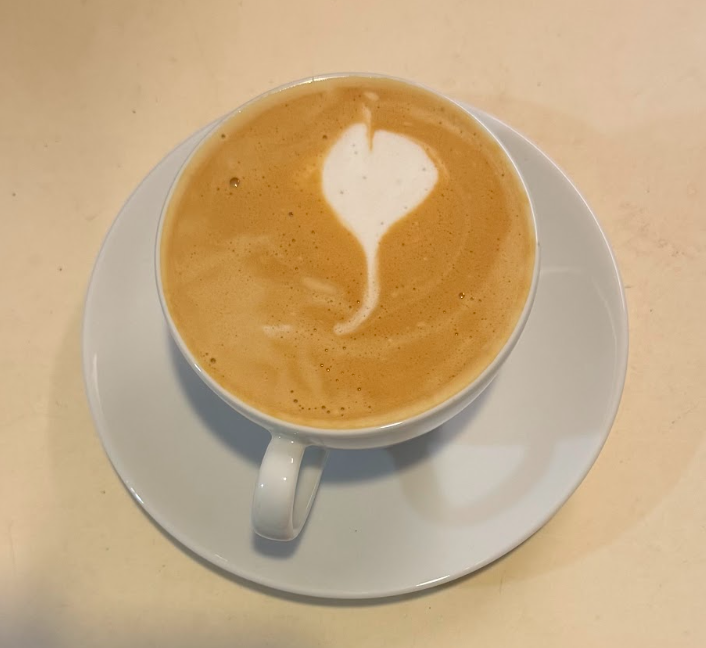
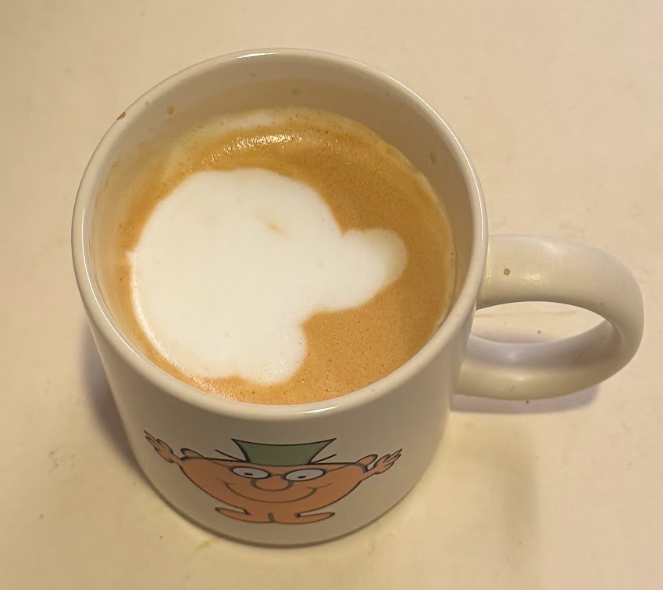
    I can’t say I have mastered creating the magical ‘heart’ design. The outcomes actually leave much to be desired. But, as I pour and draw and play with the milk, I see improvement in the fundamental technique of creating the shape.

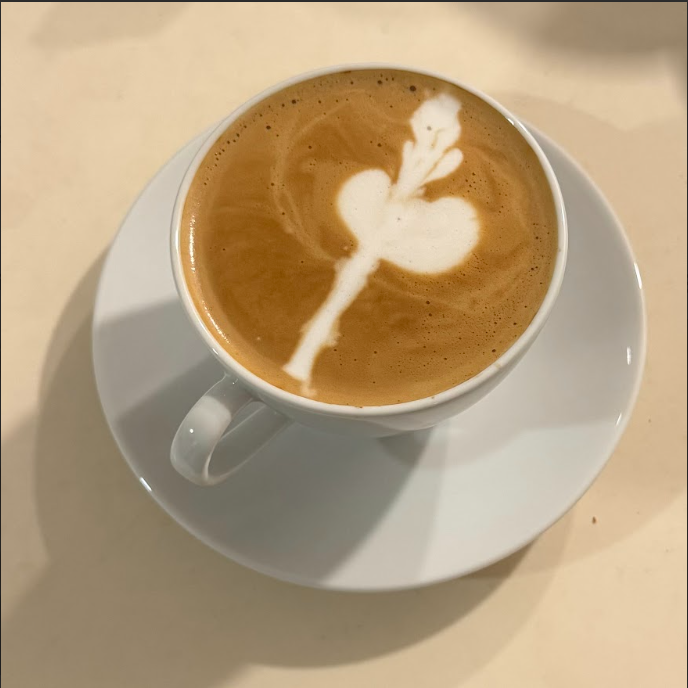
    To magically muster a heart in the coffee, one must first channel the milk to form the centre bulk of the shape. Milk should be poured in a manner where a thicker stream enters the cup first.

    This technique, as I like to describe as the ‘dip and scoop’, basically performs the function of first pouring the centre of the heart with a thicker pool of foam. After a few seconds, as you slowly push the pitcher forward, you simultaneously scoop the mouth of the pitcher up to narrow the milk stream into the cup, creating the iconic tip at the bottom of the heart. 

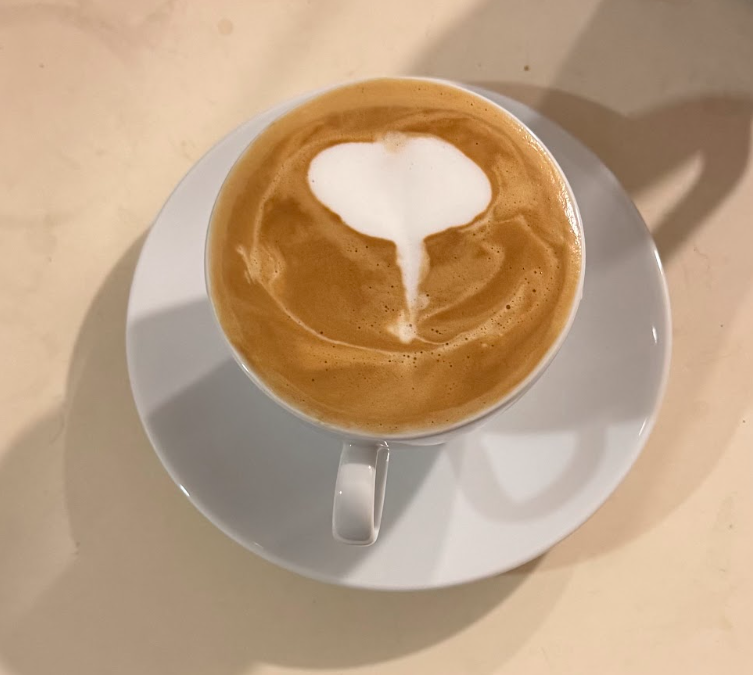
    Of the 4 basic designs, the heart would be easiest to start with for a beginner (like me). I can attest: it doesn’t require experience to first form the basic ‘pool’ of the heart shape.

    What does take practice is when you want control of the size of the heart and the shading effects of the heart (layers of light brown inside). 

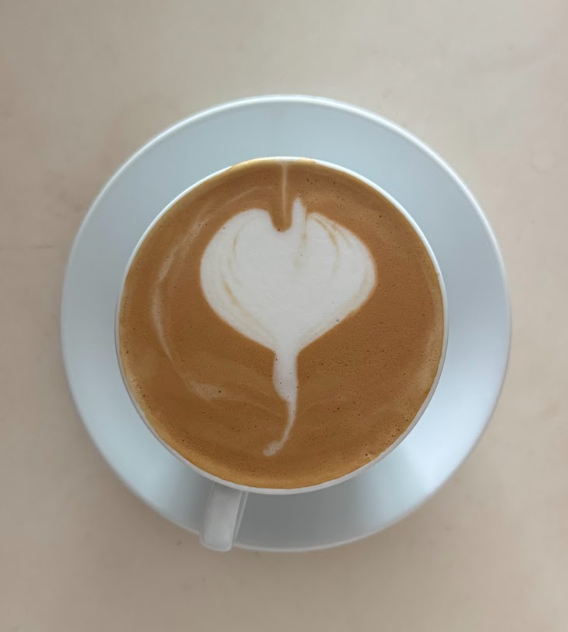
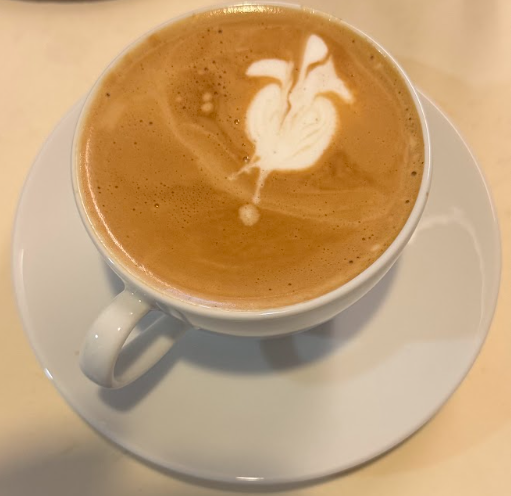
    In my latte art journey, I am currently trying out the ‘tulip’ design. Similar to the ‘heart’, the “dip and scoop” techniques apply to the ‘tulip’, but with more repetitions. 

    A ‘tulip’ is almost like 3 or 4 centres of a ‘heart’, each with a smaller size as they move up. With one big long stroke downwards, they are linked together to form the ‘tulip’ design. This stroke helps to shape the design into something like a stem of flowers. Or at least that’s what I understand so far.

    Each “dip and scoop” allows the creation of a mini-heart shape on the surface.

    ‘Tulip’ gave me the chance to keep practicing the new trick of ‘dip and scoop’. Since each part of the ‘tulip’ is different in size, I get to experiment with various speeds of pouring to form the rough shape of the ‘tulip’.

    It takes about 3 successful ‘dips and scoops’ to form the body of the ‘tulip’ before the long stroke combines it all. 

    My experience with this has been rather…unpredictable.

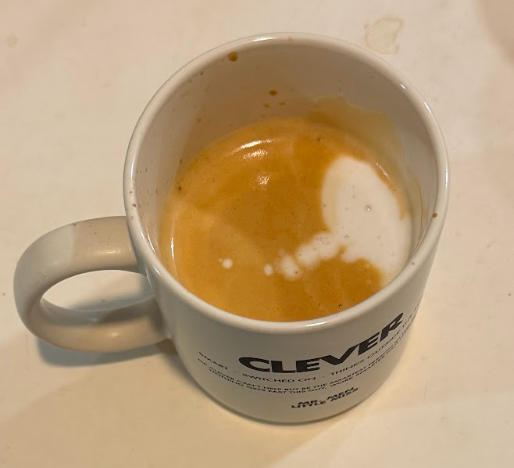
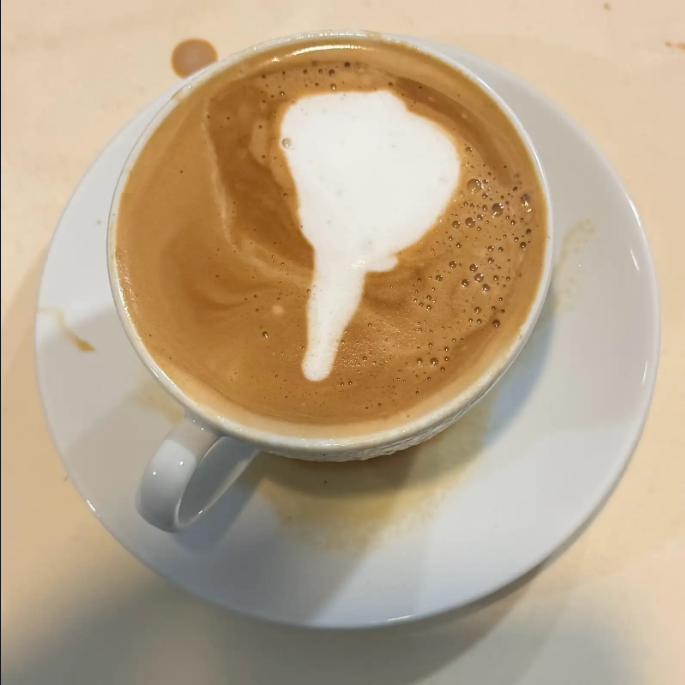
    The milk’s consistency and texture needs to be homogenous. Simply having too thick textures of milk causes the design to be ‘flat’ – it just doesn’t pop.

    Yet, having too thin a texture of milk basically doesn’t even allow you to perform any magic latte art. The milk just falls into the coffee and no foam sits above the surface.

    Poorly steamed milk ruins your overall latte art performance by reducing your chances of even drawing anything; it also decreases effective practices. That’s just two setbacks we don’t need.

    Having well-steamed milk would give the best chance at pouring beautiful latte art and hone those magical powers.

    More and more evidently, steaming milk is one level and steaming milk well consistently is another.

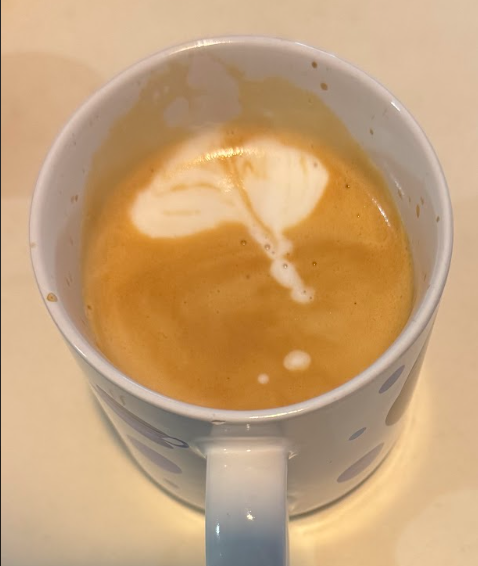
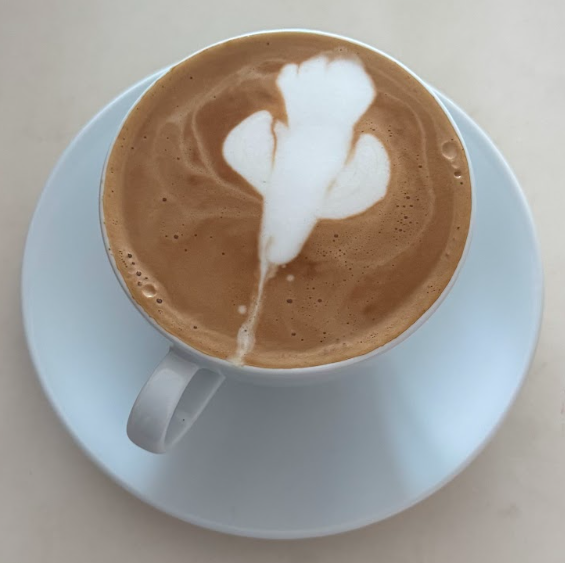
    I can’t tell you how many times I have steamed milk only to pour latte-nothing.

    Latte Art
    An example of Latte-nothing

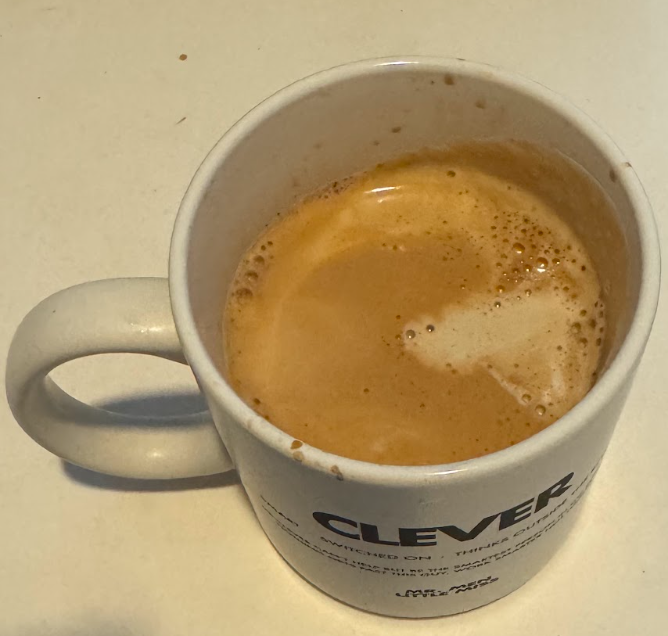
    The texture was off. Deep sighs.

    Delicious coffee nonetheless.

    So if anything has been obvious, milk and steaming it are absolutely critical to the strong and enchanting magic of latte art.

    Great steamed milk combined with well-trained techniques produces inevitably mesmerising latte art magic!

    I really had expected that this endeavour of learning latte art magic would be simpler.

    Never had I thought that there would be such fascinating troubles and challenges to create a satisfying end design in the cup. It has been 2 months since I managed to pull out some form of latte art in the cup. 

    Progress is slow, but present.

    The challenges have been tougher than I guessed. And all my mistakes had to be made, they were practically inevitable for any apprentice of latte art magic.

    No number of videos and expert demonstrations can replace them.

    And knowing they had to be made doesn’t take away the feeling of disappointment. No doubt it is demoralising to see effort but no results, but a quote from Alex Hermozi comes to mind:

    You only start from scratch once.

    ~ Alex Hermozi ~

    Every time you try after the first attempt, you start with experience. It may be little and they may seem unimportant, but each new experience takes me closer to mastering latte art magic.

    They say that ‘good things are worth waiting for’. I shall keep on keeping on. I expect the journey to go on and for these pages filled in time with my trials and tribulations. 

    They also say ‘a picture is worth a thousand words’ so here’s my thousand words – several thousand in fact. 

    Continue on my Quest for Coffee by clicking below. I’ll see you there.


    Click to explore other quirky and cool stories.

  • Quest for Coffee (6) | A Milky Way

    Quest for Coffee (6) | A Milky Way

    My quest for coffee has taken me on a milky way, since the last time I sent updates from the frontier of my adventure. As I continue my mission to master the magic of latte art, attempts and attempts at putting the art in latte art have been made.

    I think of this journey in several parts: learning, practicing, getting good, then staying good. Simply put, I’d say I am between ‘practicing’ and ‘getting good’. It really isn’t as easy to get good at the magic of latte art as I like to say it is. But nothing feels better than seeing your progress right in front of you, held in your own hands.

    Watching YouTube videos for inspiration and techniques only got me so far. If you watch the video several times, you might learn a few tricks here and there that help you. But when you watch it repeatedly, I’d say that it gets frustrating when you see experts effortlessly pull off the flattering designs and you can’t. Yours is still a slug.

    That’s all too familiar.

    Over the last few weeks, I have transitioned from steaming milk in the pitcher for 2 cups of coffee (4 shots), to trying to ‘break it down’ and steaming milk for 1 cup of coffee per attempt. I got more tries to steam milk, practicing consistency, but also more chances to draw something (or anything that looks like a heart) on the coffee. 

    With my current steaming method of once per cup, I am delighted to share that I have achieved progress. Faster, in fact. Steaming milk has become relatively easier. No more steaming volcanoes, milk explosions or runny milk and those “magic gone wrong” scenarios. Well…once in a while mistakes still happen (but that’s just human right?)

    When steaming the milk, one quick way to identify the maximum amount of milk to use is to fill the pitcher to right below the beginning of the spout’s concave design. Then, look for the vortex as the steam wand hisses away. It doesn’t take long to form when the tip of the wand is just barely beneath the milk. It takes experimenting and many trials and errors to get the hang of it.

    Really, it’s like riding a bicycle, except there are no training wheels.  

    Anyways, the progress thus far: 

    Beautiful Latte Art
    The Good
    Beautiful Latte Art
    The Speech Bubble
    Great Latte Art
    The Better

    Obviously, I am most heartened by The Better. Pun intended.

    The usage of different cups matters. It does…but it does nothing to change your magical prowess. The wand does not define your magic. Your skill and practice do.

    A cup that has a small bottom with a hemispherical build would suffice. There isn’t too much to the cup. Cups do little to refine and hone your latte art magic. But, once mastery has been achieved, you are right to believe I will try using various cups for ‘flair’, if not for anything else.

    Today is not that day. Today, we are travelling in the milky way.

    Right, so I come bearing experience (relative experience) for apprentices of the latte art magic. Here are 3 extra tips on steaming milk and pouring it. 

    (If you were wondering why there aren’t tips on practicing the latte art magic itself, well, this adventure has not yet reached that frontier. Now, onward through the milky way!) 

    The longer the wand tip is held below the milk’s surface, the more foam is created.

    If you read the previous update (fix that if you have not here), then you know that when the tip is submerged below the milk surface, a “tch tch tch” sucking-like sound means air is being mixed into the milk. By leaving the tip at that position for longer, more air is mixed with the milk.

    Common sense, right?

    In the end, it tends to create a thicker layer of foam above which can also leave your milk rather watery because less time was given for the air to fully form the “microfoam” that gives steamed milk that glossy texture. 

    But is it “bad” to incorporate too much air?

    Well, yes. Think of it this way: the proportion of milk and espresso in a cup determines the type of drink you get.

    Similarly, the proportion of air and milk determines how well your steamed milk will turn out. The ratio of air to milk directly affects your final steamed milk and hence the “strength” of your latte art magic. 

    From experience, the more milk you have, the longer and more air needs to be incorporated. The duration of the air-sucking period is thus longer. It takes time and practice to nail the right amount of air and time to steam the milk.

    Given that every machine has a different steam wand pressure, which likely affects the amount of air mixed into the milk, fine-tuning is required with each attempt. 

    Knock, Swirl, Pour.

    Read that again.

    After steaming the milk, let it sit in the pitcher for several seconds. Knock the pitcher on the surface of the table to burst any bubbles that had formed on the surface. (Some milk-like volcano is expected, so use a towel to avoid a milky mess.)

    Swirl the milk for a few seconds after that. You should see a glossy finish (like wet paint, for lack of a better reference). This mixes the foam at the top with the rest of the milk at the bottom to create a more even texture for practicing your latte art magic.

    Once swirled, you are ready for the final step: pouring!

    Pour to first ‘even the playing field’. When you first pull your espresso, the first dash of milk gives that “misty” or “foggy” effect. Think of a drop of red dye dropped in a glass of water.

    To homogenise the coffee to bring out the familiar, welcoming shade of brown, pour the milk gently from a height (say 5cm above the surface) so that the milk plunges beneath the espresso and mixes well.

    Move the pitcher in a circular motion as you pour to stir the coffee until the mixture has roughly homogenised. Be sure not to pour too quickly and fill the cup too much. You gotta leave some for that latte art magic.

    I usually do 2 full circles to “even the playing field”. You can do 1 or 3, depending on how much espresso you made and how much milk you pour.

    If you have done the milk justice by treating it with patience and finesse, you are all set to practice the fine art of drawing hearts and flowers on your coffees. All that’s left is practice and more patience.

    I have had many failures steaming milk and pouring latte art. They are but common occurrences for the apprentice learning latte art magic. Consider them compulsory learning experiences.

    Here are some honourable features, at my expense:

    Not every try is successful, but every cup is still delicious. This is the process. This is the journey.

    The journey through a milky way to mastering latte art magic now awaits you.

    Will you take the step forward?


    Continue on my Quest for Coffee by clicking below. I’ll see you there.


    Click to explore other quirky and cool stories.

  • Quest for Coffee (5) | Frothing Milk

    Quest for Coffee (5) | Frothing Milk

    Frothing milk is as important to a cup of brain-jolting, heart-warming coffee as family is to Dominic Toretto – immensely important, for those unfamiliar with the film reference. Yet, it can quickly become a frothing fiesta at first.

    Now, we know you can’t get lattes, cappuccinos or flat whites without frothing milk well. 

    At this point, I have a confession to make. If you have not guessed it, I have been trying to pour latte art for the last 1 month. 

    Shocking, I know.

    Is that it? Nah, there’s more: I have been trying to master the art of frothing milk for almost 2 months before the last 1 month of learning latte art.

    It has been quite the experiment as I tried multiple angles, tilting the pitcher left and right, playing around with the milk temperatures and changing the duration of frothing. I was wired trying to achieve that coveted silky milk texture. I still am.  I don’t get it every single time…yet.

    Until recently, my coffee-making skills were practically pressing the button on my machine and hoping for the best.

    Latte art? Frothy milk? I saw them as sorcery reserved for mythical baristas with sleeve tattoos and espresso-stained souls. Something began to change in my milk-frothing journey. 

    I finally made frothed milk this week thrice in a row with a decent texture and “shone” when placed under lights. So did I pour a dragon or heart? 

    Nope. Sorry if I got your hopes up. 

    What did happen was I poured some blob-like design that resembled an attempt at drawing a heart, great emphasis on “resembled”. 

    The latest shot of the 3 here
    One of the earliest; not sponsored by Harry Potter
    Probably the second latest one

    But hey, there’s progress, and I’m feeling slightly closer to the magic that baristas wield.

    Over the last month when the milk began to feel more silky and ideal,  I learned several things about frothing milk, brandishing the steam wand (not literally), and some neat tricks for an apprentice of latte art magic.


    Did you think that a latte, cappuccino and flat white were all names of the same drink? I did too. But there’s a surprising amount of difference between them—and no, it’s not just the size of the mug.

    • Latte: Basically a coffee bath. One shot of espresso and lots of steamed milk, with just a little froth on top. Super smooth and forgiving.
    • Cappuccino: This one has that thick, pillowy foam cap—like your coffee is wearing a tiny down comforter. Equal parts espresso, milk, and foam.
    • Flat White: Think of this as a latte’s more intense cousin. Less milk, finer microfoam, more espresso flavor. But, not quite a cappuccino.

    To whip these up, it takes some skill at the wizardry of frothing milk and nailing this consistently, unlike my attempts where the milk’s foam resembled sea foam during a storm.


    Learning to froth milk was… humbling. Challenging would also be an understatement. 

    I kept imagining the perfect angle and tilt of the pitcher to get the mesmerising milk ‘tornado” in the pitcher. I had visions of me swirling milk like a pro, creating silky foam like a caffeinated magician. Instead, I scorched milk and somehow made the wand scream like it saw a tornado coming for it.

    But as they say, you only fail when you don’t learn.

    And I learned: 

    If you’re curious about the science behind frothing milk and the usage of cold milk rather than warm milk, you can indulge in nerdiness here like I did.

    1. Wand placement is key: After many, many cups of coffee and rewatching the same Youtube video on milk frothing multiple times, my tests found a slight tilt of the wrist is sufficient, either to the left or the right. More importantly, place the tip of the wand just under the surface and in the centre of the top left or top right quadrant of the circular mouth of the pitcher. Let it hiss peacefully like a straw sucking a nearly empty cup of iced coffee. 

    I used to shove the wand into the pitcher with no clue of where it really should be, which just made hot runny milk. No latte art on that one. To get that much-coveted silky texture, you can watch this short video…maybe multiple times like I did.

    1. Stretch, then swirl: Once it hisses, start to listen for that little ‘ch-ch-ch’ sound in the beginning (this is air entering the milk). Count to 5 then sink the wand deeper just until the whole tip of the wand is underneath the milk to create a whirlpool.

    That swirling motion smooths the foam, turning it into that beautiful microfoam everyone raves about. Keep it steady, or try to. I tried shifting positions mid-swirling to get the best ‘tornado’ effect which honestly doesn’t make a difference if you nail the position from the start. Fret not if bubbles form at the top of the milk surface! A proper ‘tornado’ of the milk would burst them and leave the milk with a glossy, silky texture when done right.

    1. The heat test: Believe or not, I used a pitcher that measures temperature. But really, all you need to do, as I now do, is just feel the side of the pitcher and stop steaming when it gets hot enough to say “ouch” but not enough to melt skin off. 

    If you observe those charismatic baristas, there is no thermometer. They use their hands. Getting the right temperature for the milk is an art. It’s magic. Magic cannot be measured, so don’t sweat this. The right temperature creates the environment for the milk to stay in that texture and allows excellent latte art. I learned about temperature and its effects from none other than my go-to connoisseur James Hoffman – check out his video here.


    Here’s a secret you probably know: watching someone pour a perfect heart into a latte on YouTube is a trap. It looks effortless. It’s magic at its peak.

    It makes you “wow” in amazement. Yet, when I tried it, I “wowed” in abhorrence. 

    Here is a visual laugh-stimulator: my latest creation

    An afternoon coffee with a goofy-looking coffee

    The quest for coffee continues as I explore and learn to master the magic of latte art. If the images do not self-explain, the journey is just beginning. 


    Learning to froth milk and make latte art has been weirdly satisfying. It’s equal parts science experiment, therapy session, and morning ritual. Sure, it may not look great now and the magic powers are intermittent at best. But nothing is removed from the excellent taste of the coffee. Now, if you’ll excuse me, I’m off to try making a tulip. Or a slightly abstract flower. Or… okay, probably another blob I picture to be a heart. But it’ll still be delicious. 


    For more frontiers explored on my Quest for Coffee, click below. I’ll see you there.


    Click to explore other quirky and cool stories.

Adventurous updates every Friday!

X